So perhaps you are currently not using an efile but getting the itch to start, or you are using an electric file, but you’re not sure if you’re using the right bits for your manicure.
In today’s Episode #6 of this Japanese Gel Fundamentals Series, we’ll be going over the 6 bits you must have for thorough but gentle efile work when applying your gel nails as well as a few that you should avoid.
We are going to dissect this topic into three categories of efile bits.
For example, in our last post, we talked all about prep products needed to apply the gel to the natural nail, and we said (who’s we) I said, the more gentle, the better.
For instance, once in a while, it is ok to use a bonder on the natural nail, but only on the free edge.
Using a bonder on the whole nail continuously will inevitably weaken the nail, and three services later, your clients’ nails will start peeling and breaking especially at the free edge. You’ll be left wondering and questioning your products and expertise.
When you apply a bonding agent just at the tip (because you most likely will be clipping or filing off some length in the following service), you’re re-generating the nail. If you apply a bonder on the entire nail, then the entire nail is compromised (as in weakened and dehydrated) for the next service and then the next. At about the 3rd service… the client will start encountering problems like lifting and peeling at the free edge because that is where the oldest most weakened nail growth is. It is not at the cuticle area. Remember that area is continuously being regenerated.
So are you getting the hint that for your soft potted gel applications to thrive you need to preserve the integrity of the natural nails from the day the first service your client entrusts you with her nails?
Products like Japanese Gel and Bio Sculpture Gel thrive when the natural nail is strong underneath. Always, always remember that.
Ok, so this was a much-needed tangent; I just hate to see soft gel techs incur lifting issues and immediately reach for the bonder bottle rather than backing off a little from being too aggressive on the nails and allowing them to be themselves under the gel. That nail underneath wants to stay moisturized.
Yes. I get it that the natural nail plate is made up of dead cells of keratin, but it is still attached to a living hand with vessels and skin layers. It is not my friends, a sheet of plastic just lying on your nail bed. If it was, you wouldn’t urge your clients or yourself to continue using that cuticle oil. Am I right?
Alright, back to our order of business, we have three categories of electric filing bits, or we’ll say e-bits for short.
Category #1 Removal Bits
Category #2 Cuticle Prep Bits
Category #3 Sanding Prep Bits
I recommend you start with ONE bit for every category.
So you’re going to have 3 bits total in your arsenal. Lock everything up for now and master the use of these three so that you can have consistent results in your application. After a month or so, switch a bit or two. Try a new one for each category until you find your go-tos because, seriously, the bits that I’ve been using for my prep have literally been the same for like five years. I’ve used them consistently, tried new ones, and then just returned to the same ones I first started with for my application of soft potted gel.
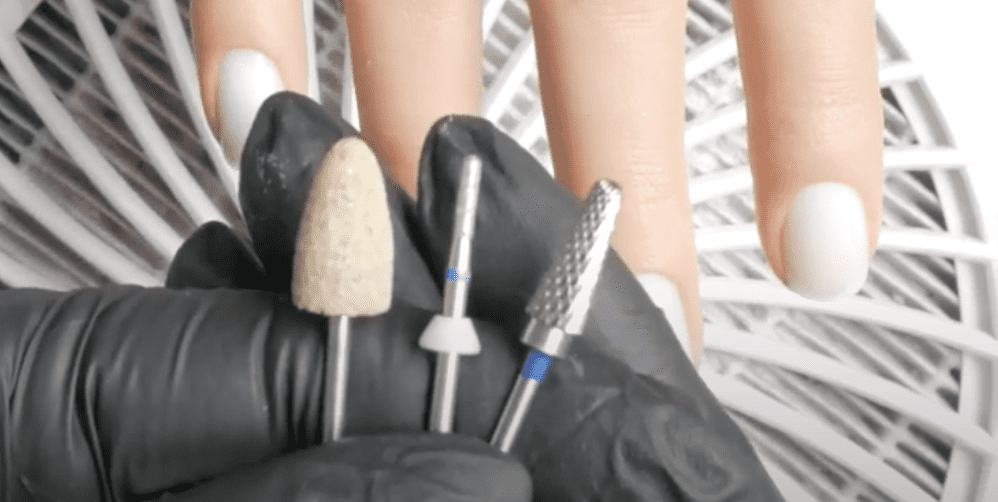
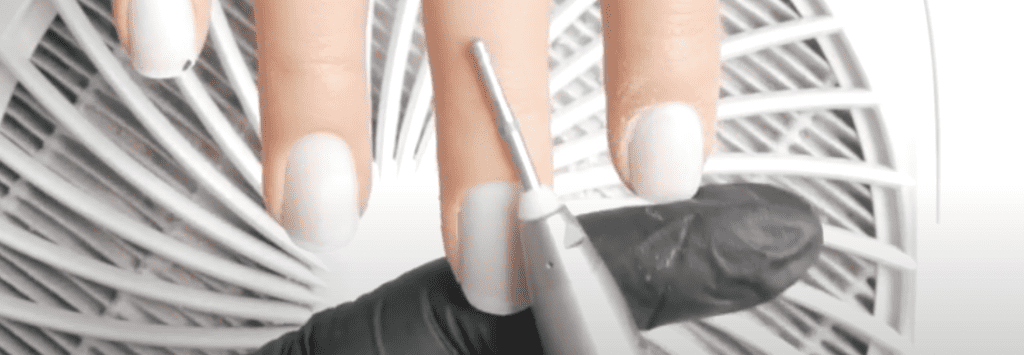
Category #1 removal.
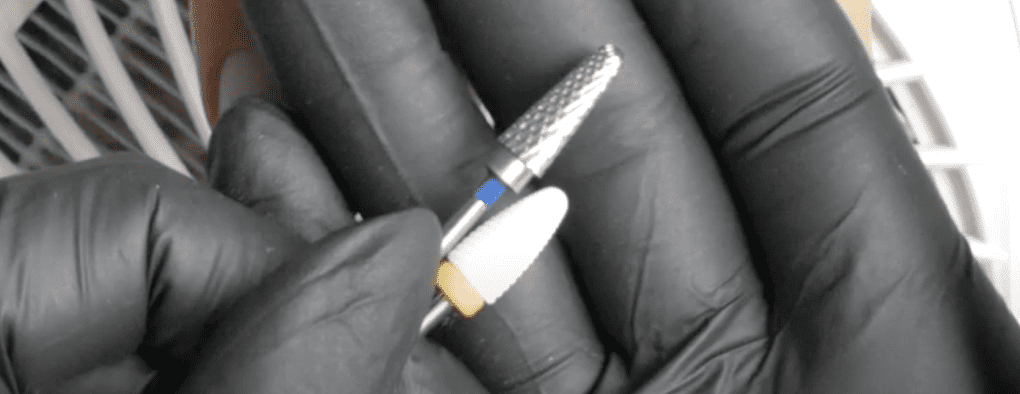
This is probably the only time you’re going to get mean with your Japanese gel manicure bits. For your removal bit, especially if your client’s overlay has a builder gel on (like Vetro’s Extension Gel or Leafgel’s Sculpting Gel), your first removal will be a carbide bit. I literally do not have a preference on what your carbide bit looks like, as long as it is carbide (or other metal; titanium is fine too) and also that it is medium grit. (The blue band lets you know it is medium. A red band lets you know it is fine grit.)
You will then crank the speed on your efile to at least 20000 RPM and in long, preferably vertical strokes (at the beginning at least) to remove the product. Do this on all ten fingers.
After doing this, you can decide if you are going to remove all of the product, I would then recommend switching over to a fine ceramic or if you are going to leave some product behind… switch over to a 180-grit board file and balance everything out.
My favorite source for carbides is Nashlynails; they stock bits from Eastern Europe. The ceramic bits I like picking up from Nail Labo are also high quality and made in Japan, and they offer them in the cone (or flame) shape, which allows you to get in the tight areas of the nail. Remember to use code PPN10 for a 10% discount at Nashlynails!
You’ll be hearing me mention these two sources in our next category, so I just wanted to give you a little brief intro to them.
The main thing with Japanese Gel and removal bits is to avoid your carbide bit from touching the nail plate as much as possible; super thin shaved nail plates and soft gels do not get along, and you will incur lifting. Even when using a bonder. The nails will be too bendy.
Category #2 Cuticle prep bits.
Ok… here is where people go cray-cray, picking up every cuticle bit that crosses their path… this was literally me, so I get ya’.
There are tiny bits, ball bits, cones, flame bits, etc., etc.,…
I use this because … after working on over 1000 different hands, I’ve seen a hand with cuticles or a few.
So after many years of doing gel on natural nails, I’ve realized there are only two types of people when it comes to cuticle work. Yup, only 2.
Those with only a tiny bit of cuticle on the nail plate (remember cuticle is on the nail plate, the surrounding little thin bit at the top is called the eponychium). So either a client will have a thin sheet of cuticle on the nail plate or a thick sheet of the cuticle. It is that simple, guys.
Any other bit of dry skin surrounding the nail plate and more on the finger is simply dry skin that can be buffed off with your hand file or buffer.
So for my thin cuticle clients, I use a thin cylinder diamond bit. And yes… Diamond bits are what you want to use. They are thorough and gentle when you let them do the work for you, rather than you applying a ton of pressure to remove the dead skin from off of the nail plate.
And that brings me to the second reason why I use this other second bit…
This is like a flat top barrel, and its width allows me more surface area to glide it on the client’s nail plate, especially when they are wide or overgrown cuticles on the nail plate. This flat-top short barrel diamond bit also allows me to prep the grown-out area of the nail when doing a rebalancing service. A re-balancing service is something I go over in full detail in Electric Filing Manicure Course. Download the free guide HERE to learn more about it.
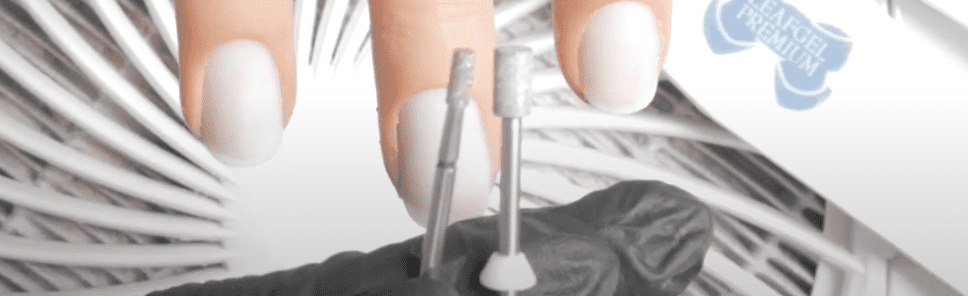
These 2 bits, the slim cylinder and the short barrel are literally what I have been using for over five years, and I almost cannot work w/o them.
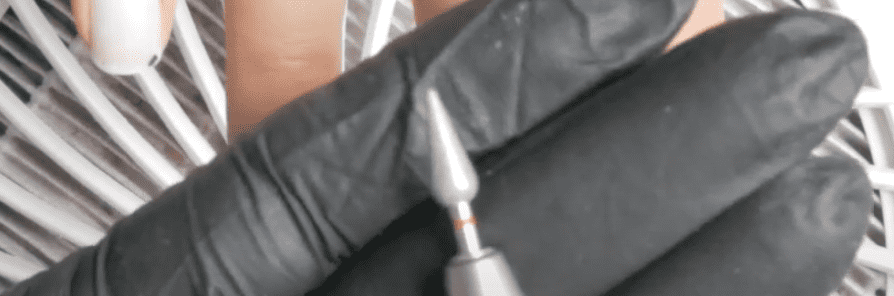
I will give a quick mention of this very unique diamond bit.
It’s a little chubby cone in fine grit; I picked it up from Nashlynails to try it out and see what this shape is all about. I just used it once, so I cannot certainly tell you it is my go, obviously, but I was so pleasantly surprised as to how gentle it was! And the chubby part of it is super gentle on the nail. I’ll mention a very similar one in our next category.
Category #3 The sanding prep bits.
These, when working with Japanese Gels, are totally optional. That is because you can take a hand buffer for sanding prep.
Now, if the word “sanding” sounds rough, do not worry; there will be no aggressive filing here. I promise. I want you to never work with anything coarser than a 180-grit BUFFER on the nail plate. No, not even a 180-grit hand file. Too rough.
Before we dive into my sanding bit faves (spoiler alert, there will not be an arbour band listed.)
Fun fact… I used to hate getting my nails done because of the everyday use of arbour bands in the salon, so I promised myself I would find the best adhesion without using these. Hence why I rave to you about soft potted gel systems and Bio Sculpture; herein lies the answer. So in like seven years of working on natural nails, I have never prepped a client’s nails with one of those. If you’re using hard products like acrylic, hard gel, and poly gel, you have to, but not with soft gels.)

So again, before we dive into my sanding bit faves, I just want to go back a bit to last week’s lesson and remind you that:
If you’re working on bare nails or “virgin” nails (so… a brand new client comes in and has her natural nails, no product, no damage), you will use your cuticle bit to prep and then use a sponge buffer with an approximate grit of 200. That is it.
Remember from earlier I told you… Protecting that natural nail’s integrity from the beginning is so important, and this is the way to do it.
Now, alternatively, if your client has product that needs to be removed and you need to flush it to the natural nail, then you will need to use your 180 grit buffer. Apply minimal pressure, and let the buffer do the work for you.
So, I wanted to mention this, not only as a reminder but so that you keep a concept of gentleness now that we’re going to move to and efile.
So, my absolute favorite is this silicone and diamond bit from Nail Labo. It has just enough texture to remove shine from the natural nail. While there are other silicone bits out there, none have a diamond material to them, and so I do like that about this one because if you let it do the work for you, it will prep the nail plate just right and gently.
The only thing about this bit is that it is porous, which means that unless you have a heat sterilizer, this is really not disinfectable up to the state board’s standards, so your state may prevent you from using this one in the salon. Otherwise, it is my favorite.
But the good news is that I recently came across a bit that is still very gentle and removes just a tiny amount of shine from the nail’s surface to call it prepped, and that is this chubby barrel from Nashlynails. Because it is metal, you can disinfect it, which means you can use it in your salon.
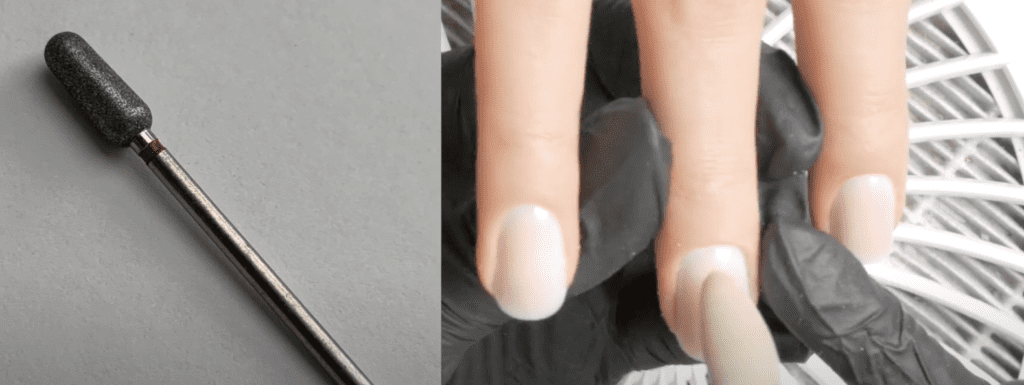
I prefer buffing bits because it significantly cuts down on the cost of nail supplies and storage, so it is worth hunting and pecking for alternatives.
And this one has a similar body type to the pointed one mentioned earlier in our prior cuticle bit talk. So if you invest in this one, you technically get a 2-in-1.
Remember, when working with soft potted gel formulas like Bio Sculpture Gel and Japanese Gels, you enter the no-arbor band zone.
Now it is time to bring it back home.
When using ebits and Japanese Gels, you have three categories of bits.
Category #1 Removal Bits. My go-to’s is a thin cylinder and a short flat-top barrel diamond bit.
Category #2 Cuticle Bits. My go-to’s are any medium-grit carbide and a fine-grit ceramic.
Category #3 Buffing Bits. My favorite is the silicone and diamond mix or just a fine-rounded diamond bit.
You can take me up on my recommendations or find and choose your own for each category.
Remember, less is best! No need to own 5 of each will… adding variables to your application will lead to inconsistent services. Please keep it simple. Always.
I’ll see you next week with Episode #07, all about the most popular styles of art when using Japanese Gels, and after this episode, we’ll only have one more episode before wrapping up this series. I hope you’ve enjoyed it thus far. Make sure to catch up with anyone you’ve missed this far.
Thank you for watching, and I hope to see you again next week, same time, in the same place. Bye for now.
____
Content written by Paola Ponce

Loved this blog? Then I think you’ll love learning more about my journey as a specialized gel nail solopreneur in the nail industry. Click here to get instant access to my free masterclass. These blogs are copyrighted material and any use of this blog is not permitted without written concern first. Some of these blogs contain affiliate links that provide us with a small commission when qualifying purchases are made. Thank you for being so supportive, which helps us continue creating valuable resources and content like this.
![Prep Products You Need For Japanese Gel Nail Application [Japanese Gel Fundamentals Series #05]](https://paolaponcenails.com/wp-content/uploads/2021/04/social-media-banner-design-with-donuts-copy-copy-copy-1024x576.png)