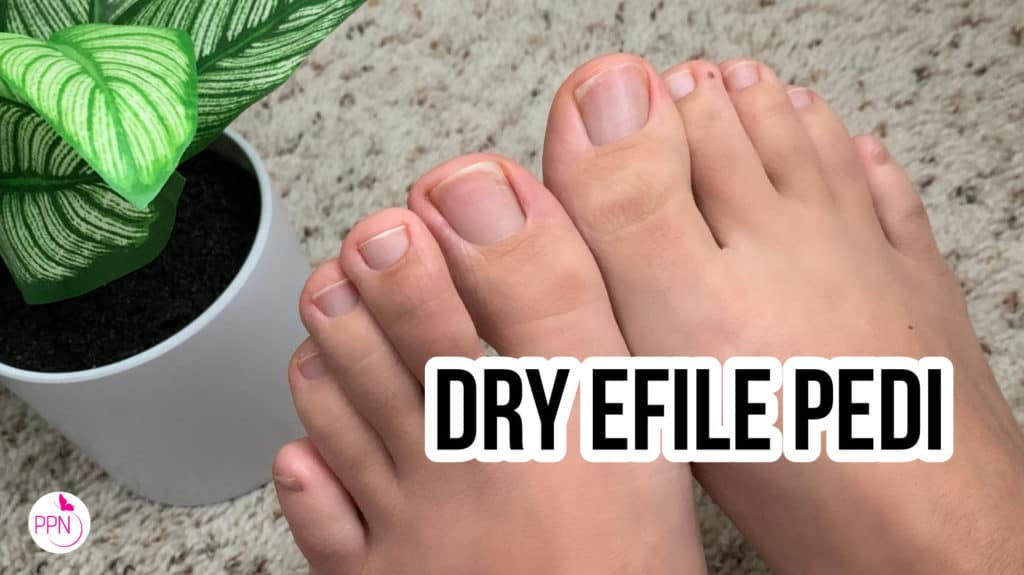
I want to show you how to seal the natural nails like they’ve never had a product before. And for this lesson, I took one for the team, used my nails, and removed all gel nail products. Of course, there may be a little teeny tiny bit of damage, and you can’t see it because I used a nail strengthener; I’ll show you what kind in a moment.
OK, so if you’re like… How do I get rid of these… striations or line breaks in the keratin? I’m going to show you how to do that. By this method that I will show you, you will essentially be sealing the natural nail back up.

1. Nail Strengthener
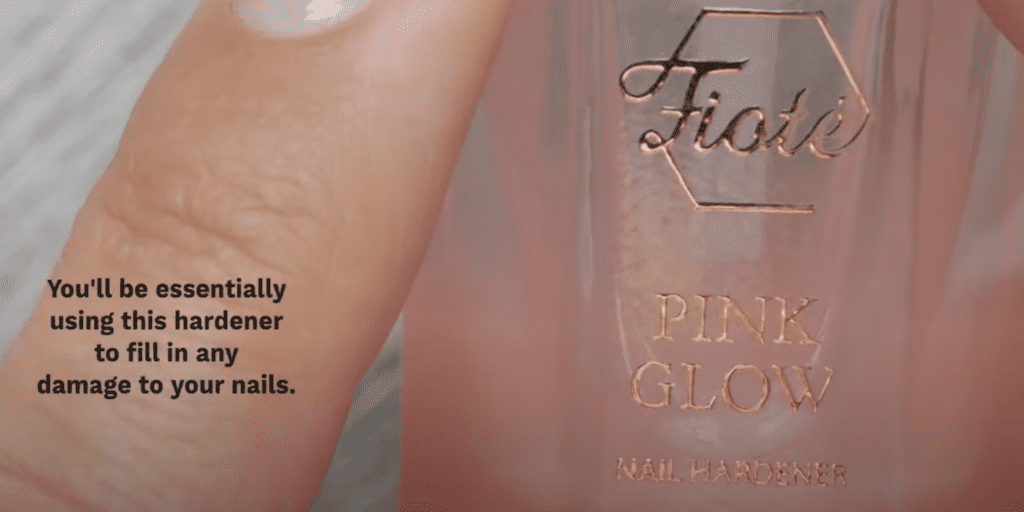
First, you want to start with a nail strengthener. I’m using the nail hardener by Fiote, which is a brand that’s available at Zillabeau. I have a coupon code for 10% discount at Zillabeau, PPN10 😉
Do two layers, and let dry. Before this step, you did not have to over-buff the nails. This nail hardener will act as a protective layer so I’m that I’m not over-filing my nails. So let’s just say that you just remove your gel. What I want you to do after removing your gel or the client’s gel nails is to apply two coats of a nail strengthener product. It can be any kind.
I’m not going to be doing cuticle work in this demonstration. Still, if you were doing your cuticle work, you can go ahead and remove the gel, do your cuticle work and then apply two coats of nail strengthener.
2. Files
After you’ve done all those steps, you will grab your files (and files are going to be very important). I couldn’t find one brand with everything I needed, so I will use Vetro and Leafgel.
Both of these brands offer high-quality files, and if you can afford to buy these brands for your clients… these are excellent.
I will use the Emery board from gel nail brand Vetro, which is like a 200 or 180 created, very gentle natural nail board file. I’m also going to be using their shiner. This is like a four hundred grit here; the other side is The Shiner. If you rub this on the nail back and forth super fast, it’ll give you a shiny finish. But you got to work your way to this; you can’t start buffing the nail and expect to get a shiny finish just by jumping into The Shiner buffer. You have to kind of work your way through this, OK? I’m going to show you how to do that. And I’m also going to use the Leafgels’ sponge buffers.
I will be using the buffers as follows:
- The 100/180 grit buffer
- The 220/280 grit buffer
- The 400/1000 grit buffer, The Shiner buffer.

Shaping
Once the nail strengthener sets, you will file your nails into shape.
I’m not going to give them a perfect shape because I want to leave that for my training tomorrow. Just like a general shape, getting rid of harsh corners.
I will file in one direction to not split my nails, and you will do this in all ten fingernails. If you’re interested in learning how to shape your natural nails in five different ways, check out this video I created showing you how to do that step by step.

1.100/180 Buffer
Next, grab your 100/180 grit buffer. Now, I’m a little scared to use the rougher side; even though this is a very good quality file or buffer, it’s not going to be too gritty where it damages my nail. Still, I’m barely going to go over my nails just to ensure it’s nice and smooth. There’s no light gritty part or anything like that, OK? Nothing rough, nothing sticking up.
I’m only going to do that from the free edge towards the center of the nail. I have new nail growth and do not want to touch it. Just very gentle. I’m letting this high-quality sponge buffer do all the work for me, only like two-thirds of the nail.
After that, I’m taking the less rough side, 180g, and doing two-thirds of the nail, but I’m going to be a little more aggressive.
Not too much, only adding a little bit more pressure.
I need to smooth out this part here, so I use the rougher side quickly and then just continue. Do this on all ten fingers.
Do not touch the new growth area, just the part where the gel was applied.
Be really gentle when using this buffer. It’s a high-quality buffer. It’s not going to damage your nails as far as the grid is concerned, but by doing it excessively over the nail, even with the two coats of nail strengthener on, you could buff off the strengthener, get to the nails and thin them down.
This is all to protect your natural nails, but at the same time, seal them back up as if they didn’t have gel product prior.
So here’s the final result of having done that step.
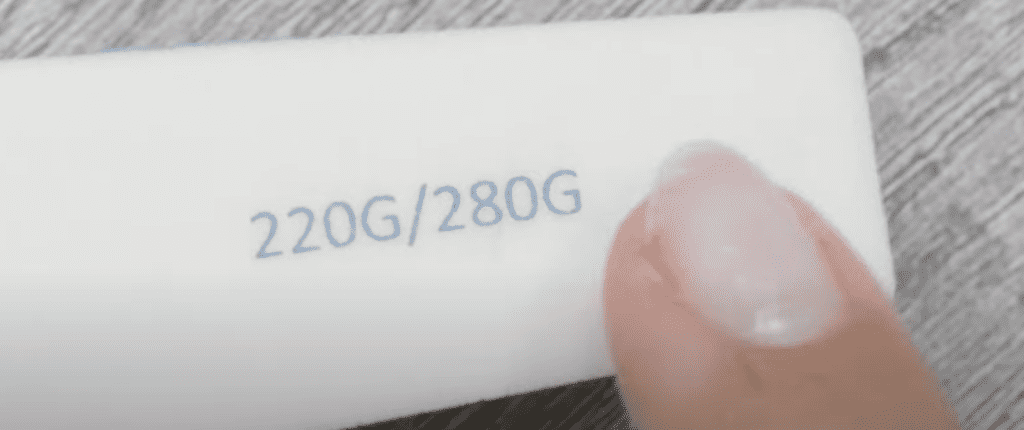
2.220/280 Buffer
Now, take the 220/280grit, start with the coarser side, and then move on to the softer side. I’m going to buff the nails again two-thirds of the way, but kind of fast passes there.
Now, this may seem a little tedious, and you’re probably like, Paola, do I really have to do each side? And the answer is yes. If you want a high shine finish and seal the natural nails, you just have to go through all the processes and come down to The Shiner, which is like a 1000grit, super fine grit.
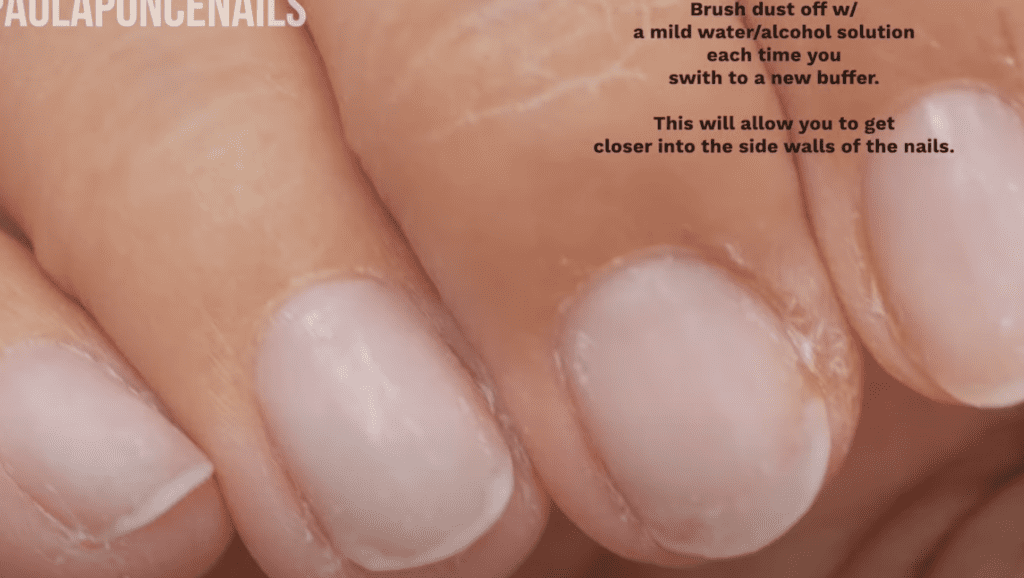
OK, so now it’s time to do the 280. Do it on all 10 fingernails. Use some pressure and be diligent around the sidewalls.
At this point, you should have no feeling of anything, everything should be nice and smooth, and you’re ready to move to The Shinner.
3. The 400 Buffer
We’re going to start with this green area, which is, like a 400 grid, very gentle to do the shining portion now.
We’re going to do the same thing, but now you get to do it on the entire nail because this is very gentle. So it’s not going to do more than just remove the shine from the natural. Now, do it on all ten fingers, and you can start applying some pressure, especially where the gel was.
You will get fine dust because it’s not coarse but removes the nail’s shine. If you want the shiny final effect, the entire now has to be prepped with this green buffer. Really get around the cuticle area and sidewalls and repeat on all ten fingers.
All right, I’ve used this green buffer on all the nails. I’ve applied some pressure, as you can see, but I made sure that there were almost no signs of damage on the nail, the wide splitting, or anything like that. No big deal if there are still some markings.
As long as you cannot peel it; Yeah, it looks a little indented, but these layers are not coming up.
This post shows you how to seal the nails so that nothing can get snagged as it grows. You can just strengthen these with your nail strengthener, or if you’re using a system like IBX, you can do it right now and apply it.
We’re assuming this is a client, or these are your nails, and you’re doing a final shiny buffer manicure. You really want to seal the nails as if they never had splitting, ridges, or striations coming apart at the very end.
5. The Shiner Buffer
Now super excited! It is time to use the shiny buffer! I will take a bit of alcohol solution or cleanser and get rid of the dust.
You can also wash your hands at this point, but I’ll use alcohol and wipe it off. So, again, you’re sealing the nails, so there will be no breaks, cracks, nothing like that.
Just so everything is nice and clear, and it doesn’t get in the way of our shining.
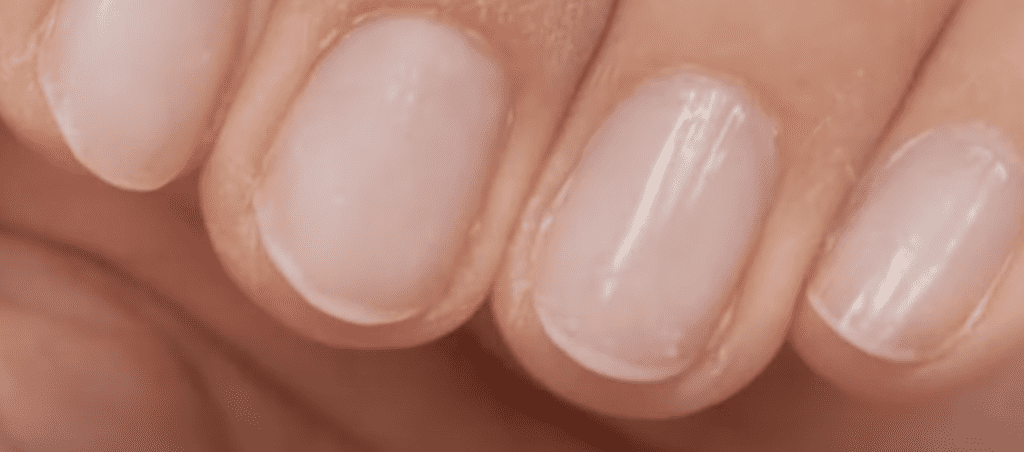
And you can see there’s already a shrine to the nails to see that it’s pretty cool. Now I’m grabbing that shiner.
You want to apply a lot of pressure. You want to do long and fast strokes, OK? And this is going to really seal the deal. You should be able to hear a squeakiness, which lets you know that you’re doing it right. All right. So this is how I used to finish my client services. If they didn’t want a clear coat or if I wasn’t offering a clear coat, I would bring their nails to a high-shine finish like this. There you have it! Natural nails sealed and shiny to perfection.
This is how you seal the nails with a shining buffer.
Again you can stop at the 400g buffer and then do your base gel application; maybe apply the nail strengthener if you use something on the nails. Otherwise, if you’re just leaving the nails bare, leave it at the high finish. The nails are sealed.
Finally, if you haven’t already, you would just do your cuticle oil and wash your hands.
Thank you so much for joining me. Find me here next week with a new post, and if this blog helps you, let me know below!

These blogs are copyrighted material, and any use of this blog is not permitted without written concern first. Some of these blogs contain affiliate links that give us a small commission when qualifying purchases are made. Thank you for your support that helps us to continue creating valuable resources and content like this.