
Organizing your nail studio or desk is seriously one of the funnest and, at the same time, most therapeutic things you can do besides the actual nail creation. But while many nail studios are gorgeously decorated, they’re not always maximized to full efficiency.
Meaning, helping you work more focused so that you naturally work faster. I’m all for taking the time you need to execute a beautiful, long-lasting result, which is why I thought I’d take you behind the scenes of my nail desk.
Even though my nail desk is optimized with equipment for recording, it is set up in the exact same functional and efficient way to serve a client, even though I only use the space for demos.
Alright, let’s explore my nail desk.
To take you through my desk setup, I will divide the sections in terms of tertiary, secondary, and primary supplies. Primary supplies are those that you need for every client; they should always be within hand reach. You’ll need secondary supplies to execute your work, but maybe not for every client. Tertiary supplies are those that you need every so often.
Let’s start with the not-so-fun stuff, storage closets.
I highly recommend having a closet area in your space or studio, as you wouldn’t want to use your home as storage. Your closet usually stores tertiary supplies, which you need to stock up on.
Here I have:
- Boxes with dental bibs,
- Lint-free towelettes,
- Boxes of equipment I have in case I need to return something, sell it, or move, so it’s a good idea to keep the original packaging.
- Large containers of solutions like alcohol, acetone, etc.
- Glove boxes
Again, I just want to show you why you need a closet for your nail supplies. You could take some stuff home, but then you end up storing everything everywhere, and you want to keep your home as your home and your nail studio as such.
Next up, behind the desk.
Don’t leave the back of your desk unused, and it should store things you use regularly, but not for every client. These include your colors (which can also be mounted on your wall), nail art, computer, or appointment book.
Under the shelf…
For me, this is where all my potted gel colors live. I found these crystal-clear drawer organizers on Amazon, and the pots fit perfectly. I organize them by brand and my number, making it easier to find a color. You must be able to see your colors. That’s why I recommend clear cases; otherwise, you will forget what you have, and we don’t want that.
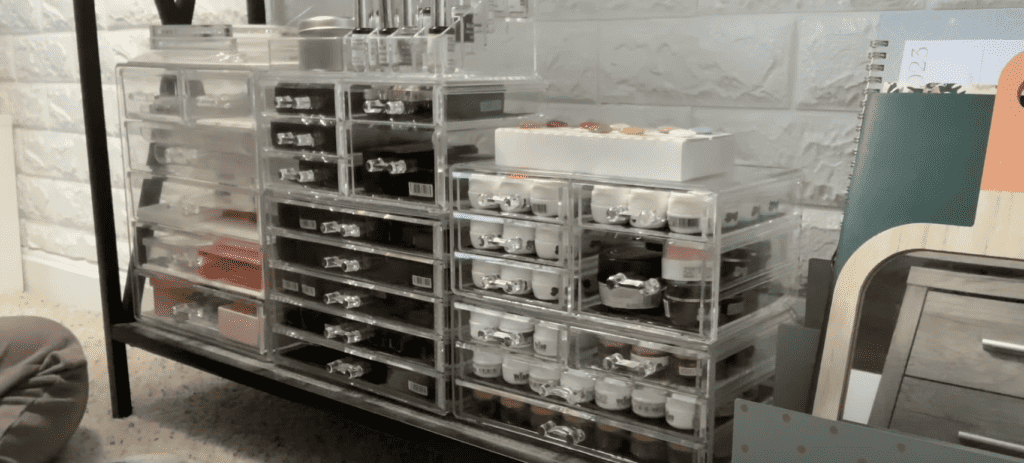
Another great benefit to these drawers is that they will be much easier to clean because they are protected from dust and whatnot so you don’t have to clean each pot/bottle every time.
I have a separate selection of clear acrylic drawers for my nail art supplies. I don’t have a ton of stuff because I am a minimalist, so I am more of doing the most with the least amount of supplies.
I have crystals, stones, flakes, and glitters, a binder with foils, stickers, and decals.
I recommend having a shelf behind your station. It’s super handy to be working and being able to turn around, grab something and then turn back around and keep working.
On top of the shelf, your back station…
On top of my shelf is my administrative area, where I keep my computer or online booking system and a physical schedule book or agenda; that way, I can twirl from my booking station to my client station in seconds. From there, I will finish my service and ask my client if they want to check out the schedule for the next 2-3 weeks to book an appointment because we are a super busy/high-demand nail artist., right? Super smooth, easy, professional transition.
What’s inside the drawers?
The stuff in your drawers should be a mix of primary supplies with secondary supplies. My drawers are very organized to have the most functional setup for me.
1st drawer: you should have everything you use/need instantly and things you have multiple varieties of, like:
- Base gels, top gels, builder gels, and any utility gel you use during a service.
- Tools you use frequently, not all the time but frequently, for example, nail forms, dusting brush, nail glue, liquid septic, efile bits, dappen dishes, brush cleaning gel.
- Things that you use in all of your services but don’t need to be replenished as often as alcohol, wipes, etc.
- You can get drawer dividers to organize them by type of gel or by brand. The clear ones I got are from Amazon.
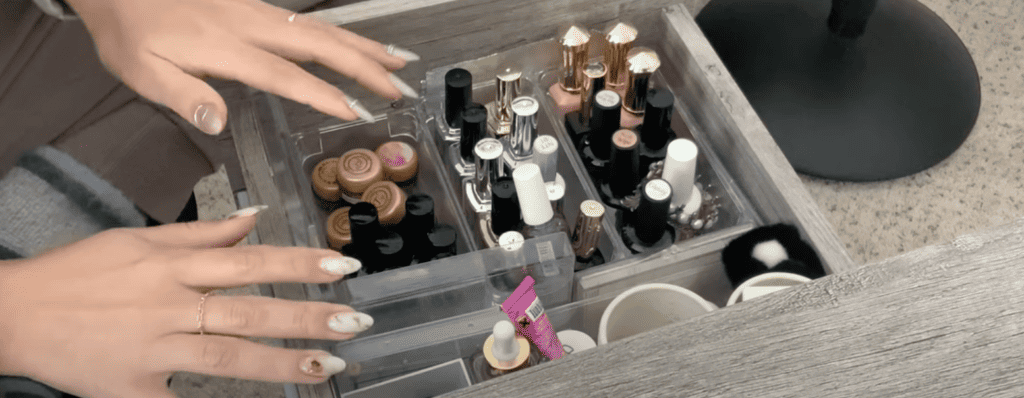
2nd drawer: All my bottle colors and these are from Kokoist and Vetro. As you know, I specialize in potted soft gel, so any bottle form color goes on here. I don’t have many because I don’t like to lose focus on the brands I like and trust, so just a few things from the brands I use.
3rd drawer: Secondary gel brushes, the ones I don’t use regularly.
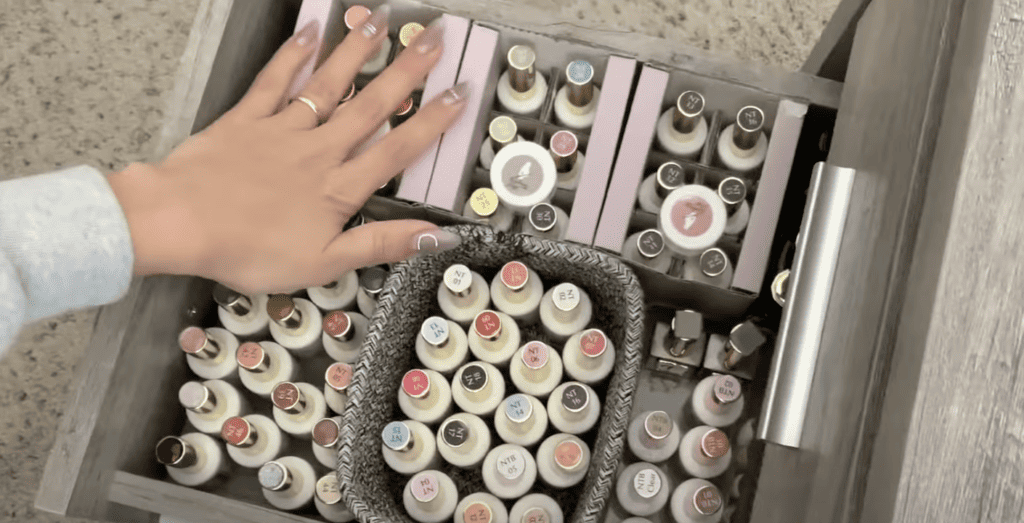
- I have a lint roller to clean lint, a pile of dental bibs (these are linked in my Amazon storefront), and masks.
- Refill cuticle oil, acetone, hand files, and buffers.
- Color swatch books. These fit nicely inside my drawers, and I think you can get them on Amazon, too, now.
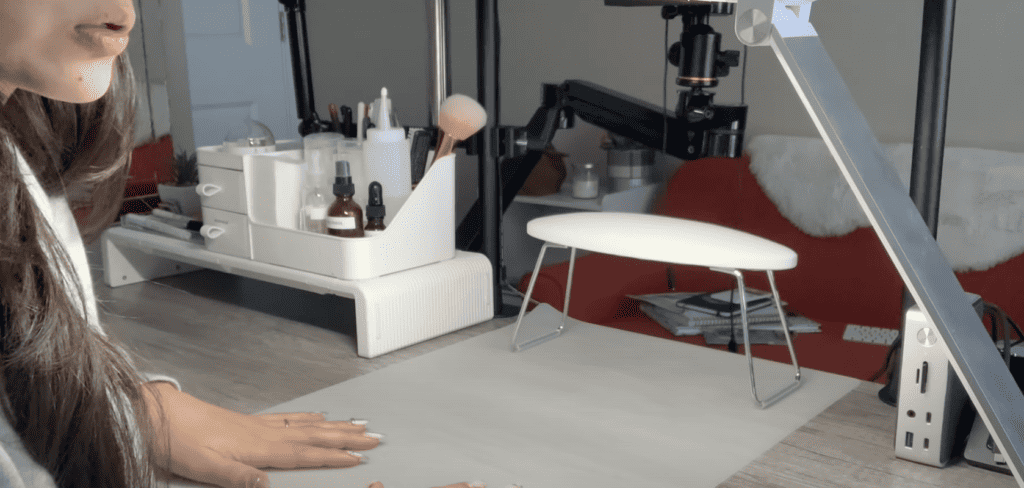
And now, time for the fun stuff… Your tabletop!
Your tabletop is home to all of your primary tools.
To my right (keep in mind if you are right or left-handed), I have my efile, cordless curing unit, and a closed trash bin; make sure it is a close-lid one so you keep the fumes of your solutions and gels closed and away from you while you work.
Under that, I have a bin with full coverage tips, a dust collector, etc.
First, you’ll want to have a little table/stool next to your client’s chair so they can place their belongings, like their purse or drink, during the appointment.
On the top! I had a towel in front of me, and I placed the dental bibs on top, then switched the dental bibs after every appointment.
A nail caddy. This is the money-making space, guys. This is where I keep:
- My disinfectable nail dusting brush,
- Stirring tool and French cleaning brush,
- Hand nail files
- My primary nail brushes
- Water for decals or water art
- Hand lotion (for personal use)
- Disinfected tools like cuticle pushers and nippers
- Primary use tools like tweezers, scissors, etc.
And under the caddy, I use that space to store nail art like nail art binders and swatches ready to go for my clients. Perfect for occasions where they are willing to do something fun or different, you pull those out and work like a charm.
To recap…
As you can see, setting your desk and nail area for success is key to working efficiently or simply smarter and not harder. The setup I have here at home for content creation is the same exact setup I had at the nail salon. Please let me know if you enjoyed this post in the comments below. What was your favorite organization tip today?
Remember, the fewer things you have, the better! You want to be strategic about what products you own and the placement of your workstation to save time and money. This setup works for me, so try out a few different arrangements similar to this one and find the most functional setting for you! It will make everything easier, more professional and prettier.
Thank you for joining me today! I’ll see you at the next one. Bye for now…

Content written by Paola Ponce
Loved this blog? Then I think you’ll love learning more about my journey as a specialized gel nail solopreneur in the nail industry. Click here to get instant access to my free masterclass. These blogs are copyrighted material, and any use of this blog is not permitted without written concern first. Some of these blogs contain affiliate links that give us a small commission when qualifying purchases are made. Thank you for being so supportive, which helps us to continue creating valuable resources and content like this.


