
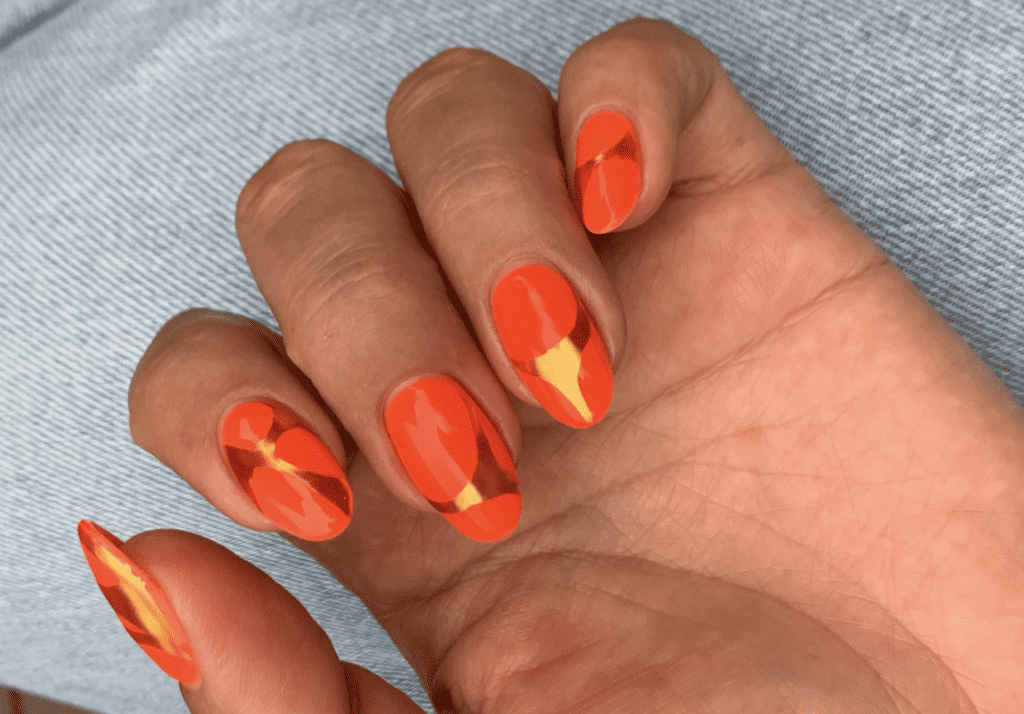
Upgrade your clients’ nails with this look easily! And never spend on stickers again (at least if you don’t want to) with the technique you’ll learn today for these chromes!
(By the way, I struggled coming up with the name for these. What would you call them? All I could think about was oil droplets splitting or stretching in water or teenagers’ lava lamps in their rooms. Either way, “Gold Slick Nails” was ultimately what I chose.)
For today’s look the surface of the nails you are working on (whether natural or extended) must be nice and smooth. You can do that via a structured overlay application or by extending the natural nails. (We teach those techniques in our Master Gel Nails Course.
And the reason why you want the surface to be super smooth is because if it is, the chrome is just going to accentuate any ripples and other imperfections.
You’ll really enjoy this design, and you can experiment with different colors of chrome! If you re-create it, tag me- I want to see it!
Here are all of the materials you will need:
KOKOIST– (code PPN10)
- Nail Color: E-58 Kokoist Neon Toy Orange
- Long Liner Brush
- Chrome Pen: Gold
ZILLABEAU – (code PPN10)
- From The Nail Clear (Burnishing Top Gel)
- Leafgel Perfect Shine Top Gel
Here’s the step-by-step recipe for this look:
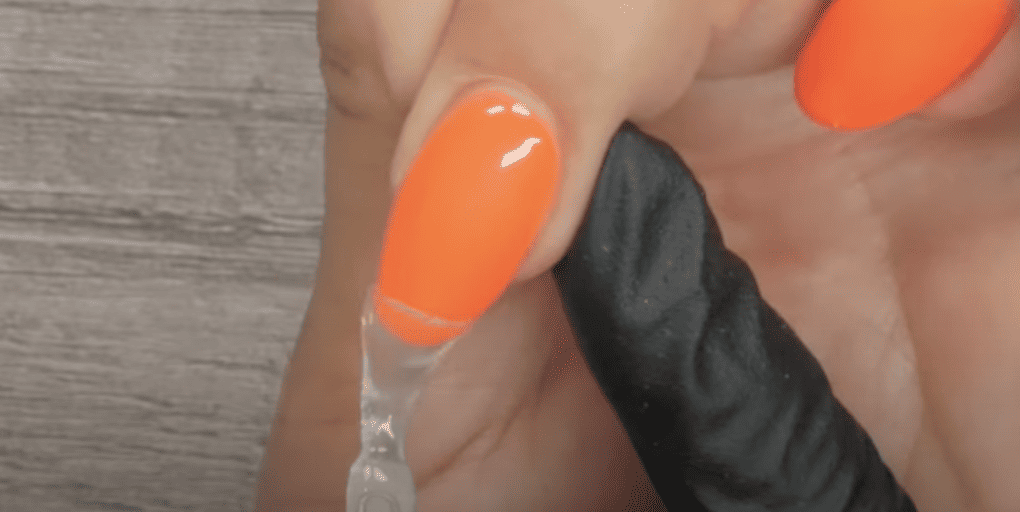
Step 1: If you have top coat on your nails, use a 180g sponge buffer and matte out the surface. That’s what I did to mine to make sure the gel adheres well. Remember, the gel does not stick to shiny surfaces.
Step 2: Now, I will apply one coat of clear gel; this is a burnishing topcoat. Many brands have their own version of this gel, but I like this one from the Korean Brand, F Gel, or From the Nail because it’s not super temperamental, in case you over or under-cure. Apply one coat in all fingers and cure in the lamp for at least 30 seconds.
Tip: When working with chrome, you want the surface to be nice and smooth, which means nicely self-leveled or have a bit of structure; otherwise, every imperfection is going to come thru the chrome.
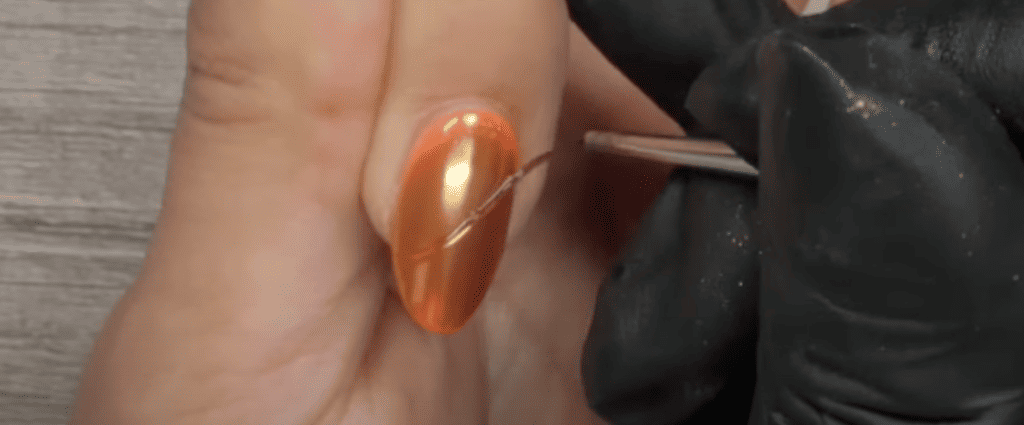
Step 3: You definitely have choices when it comes to Chrome. I will be using Kokoist Gold chrome pen. I use the pen’s sponge applicator and chrome powder over the cured clear gel. These pens can sometimes grab too much powder, so I’ll return with a separate applicator to thin it out. Some people use their fingers; make sure to use gloves to prevent skin from touching the products. Also, your bare finger can leave oils on the chrome powder, leading to lifting. Ensure you are thorough when applying the chrome powder to the nails.
Step 4: Now, Im will use Leafgel’s Extreme Clear Top gel. You can use a long liner brush to use the top gel and map out your design. Remember that the areas where you apply the top gel remain chrome after we wipe off the nail. It doesn’t have to be perfect; map out your design. If you are happy with the shape, come back and fill it out with the top gel.
This top coat is perfect for this step because of a few of its very cool characteristics. 1) You can scrub it, like when you rub off the tacky layer. This top coat has a tacky layer, you can rub as much as you want, and it won’t blur. Sometimes when you are removing the tacky layer off topcoats, you don’t want to scrub or rub too hard because it can dull. 2) This top coat can be applied thick. The rule of thumb is that top coats should not be applied thick because their clarity can decrease, but this gel can be applied thick without compromising the clarity.
Tip: If you are unhappy with your design and want to start over, here’s what you do. Buff the nail to a matte surface, apply a layer of clear burnishing gel, thoroughly rub on the chrome pigment, and map out your new design with the long liner brush and the top gel. Also, for this design, make sure you are burnishing the perimeter of the nail, meaning the sidewalls and free edge.
Step 5: The super satisfying step, the reveal! For this step, you need 90% alcohol and a lint-free towelette. Wet the towelette with alcohol and scrub off the nail and see your design come to life!
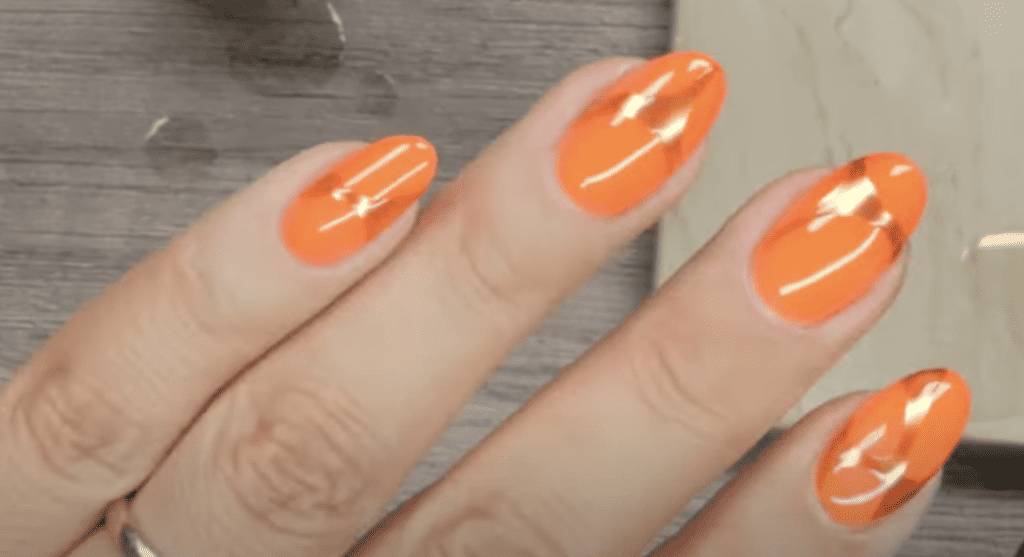
I want to point out again that because the top gel I used to burnish is already shiny and because the gel I used to trace can be scrubbed as much as we want and remain shiny, this is it. You don’t have to do anything else to this manicure, it is done, and it turned out lovely.
In conclusion, this look is chic and timeless, an easy sale for the most nail art-hesitant client. Try it for yourself and see your clients gravitate toward it! Thank you so much for joining me today, and I’ll see you very soon. Bye for now…

Content written by Paola Ponce
Loved this blog? Then I think you’ll love learning more about my journey as a specialized gel nail solopreneur in the nail industry. Click here to get instant access to my free masterclass. These blogs are copyrighted material, and any use of this blog is not permitted without written concern first. Some of these blogs contain affiliate links that give us a small commission when qualifying purchases are made. Thank you for being so supportive, which helps us to continue creating valuable resources and content like this.


