
Hey there, have you worked with full coverage tips where you leave a gap between the tip and the cuticle area and then rebalance the nail? If you have, you probably have incurred some awkwardness or disconnect in the cuticle area to the rest of the nail.
Today, I will show you how to ensure the new extension is one flawless full piece. Let’s begin.
Real quick, before we jump in! I want to invite you to a free training I am hosting today. It’s called “The 3 Secret Application Techniques You Must Know For Monthly Wearing Gel Nails Using Kokoist Only!” As you may already know, I am hosting a Kokoist online certification on the week of November 6th. This Thursday is the last time to join us, so if you want to punch in your ticket for that certification, enrollment closes on November 3rd at 9 pm.

If you want to learn a bit more about Kokoist, make sure to join our free class tonight. You do have to register, so click HERE to grab a spot!
Alright, back to today’s topic.
If you apply your tips, the Kokoist Gelip system that is not ABS, they recommend you leave a 1-2mm gap by the cuticle area. Do you have to? Am… I guess not. You can definitely press them back, but in the salon, I like to offer this style of full cover tips where I leave a bit of a gap and then rebalance it to look more natural.
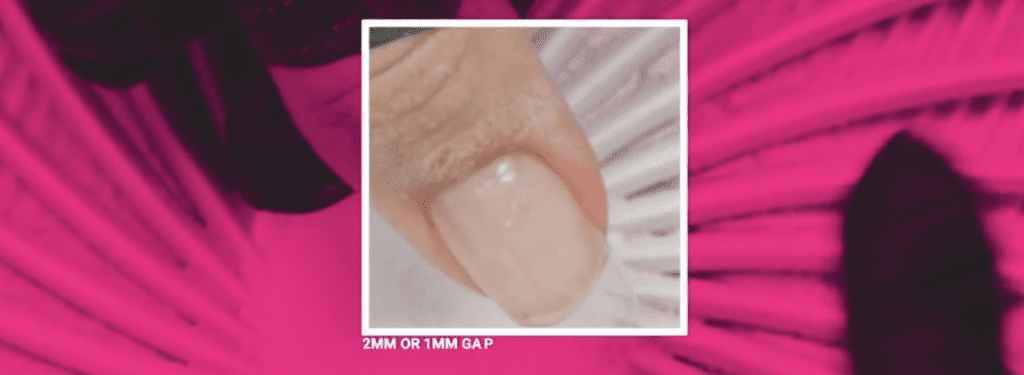
Sometimes with the full coverage nails, when you tuck them right under the skin, as it grows out, you end up with this indentation or lip or lifting here. It lasts long, but I was not too fond of it; I always recommend doing it this way per my Kokoist training. I was very excited because I was like, Hey! I was already doing that at the salon; it just felt like a more professional service of doing the full coverage tips.
When the full coverage tips first came out, we were all skeptical. Is this really professional? is it worth it? Is it just a phase? But it’s here, and it’s here to stay.
Ok. Even though this nail already looks smooth and like part of the natural nail, why would you touch it? It won’t be because as you overlay it with gel, especially thinner consistency gel like what I use, the gap between the tip and the cuticle area will not be flushed. It will either thin down or, if you have a thicker viscosity gel, the nail will get too bulky.
1. Flush it to the natural nail.
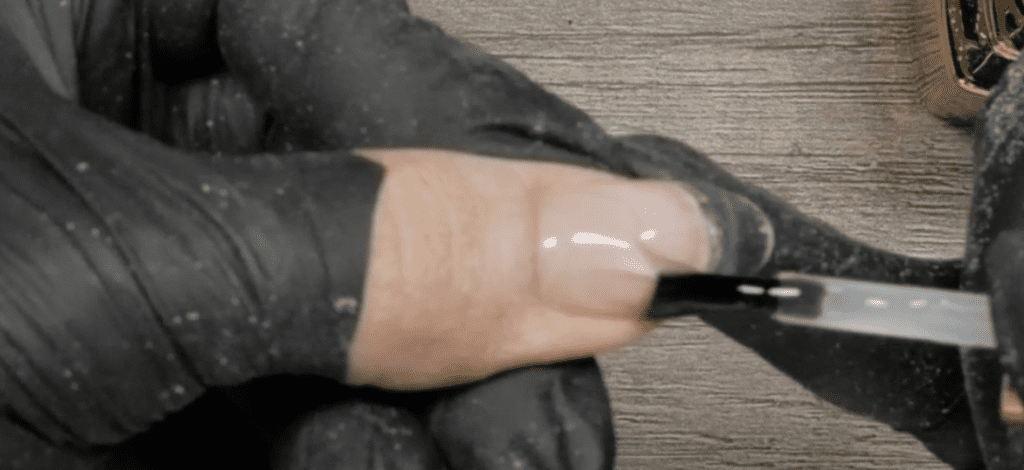
So first, file or flush the edge down to the natural nail to get a flushed nail downward. To do that, I will use this cone-shaped ceramic bit; people call it the corn-shaped bit, and I like this one to get in that space around the cuticle.

Brush off the dust and use your hand file to detail the free edge.
Use a gentle file, a 180-grit emery board file, to taper it down.
2. Taper the free edge & a bit more flushing.
Now I want to taper the cuticle area even more with a different efile bit. I will use a bit that I’m delighted with; either the baby barrel or a thin cylinder diamond like this one will be excellent for this.
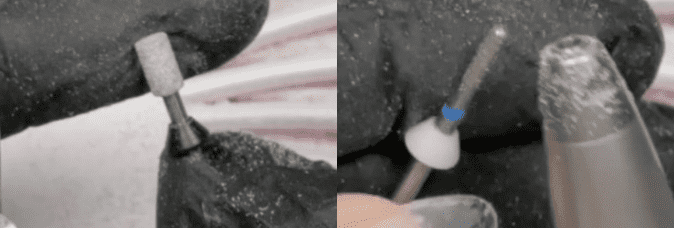
Use the bit to go around the cuticle area and the sides. Because it’s a very fine grit, this will flush the full coverage tip to the natural nail like a dream.
Again, brush the dust off and follow with an alcohol-wet brush.
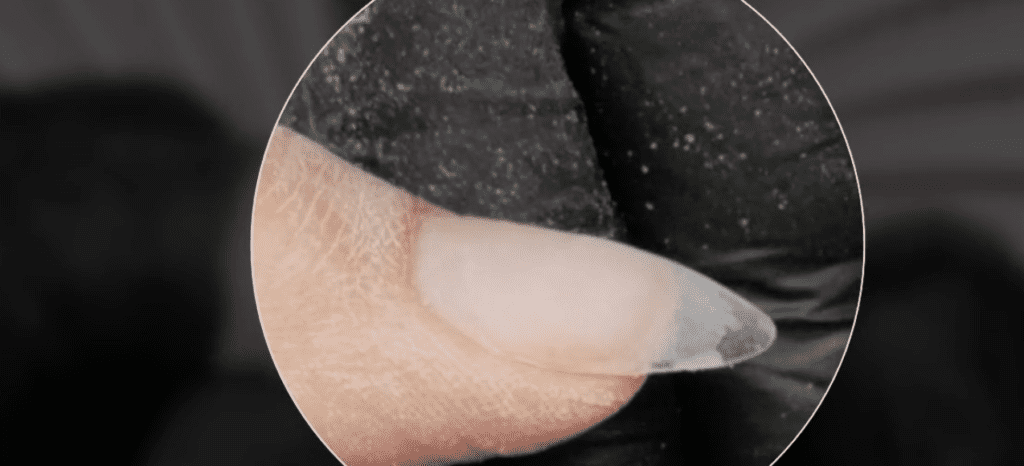
You should be able to see it utterly flat from the side, then the apex, and downward—no step or indentation from the tip to the natural nail.
3. Marry everything together with a sponge buffer.
We want to make everything the same height here, so I will do one last buff with my sponge buffer to marry everything together. Remember, you are working with runny gel, so any grooves or indentations will interrupt the gel, and you don’t want that. You want to keep everything super smooth.
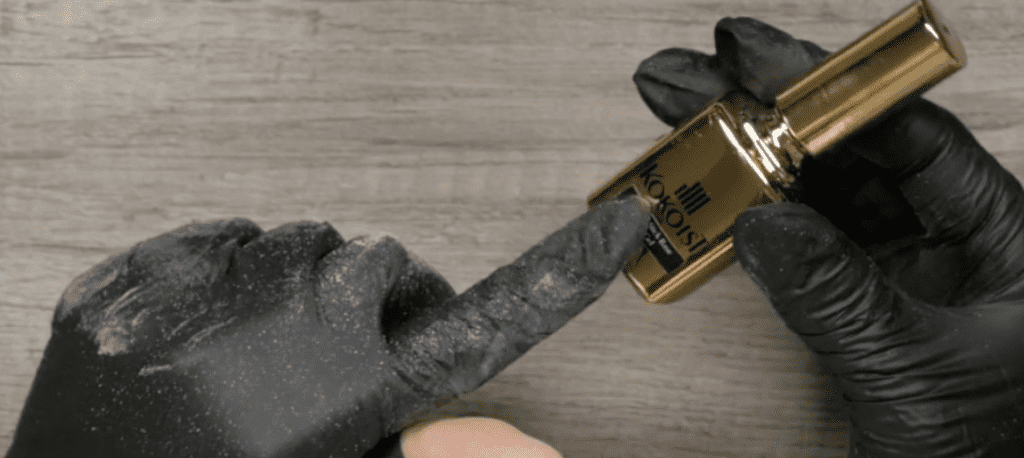
Dust the nail off, followed by a wet brush (alcohol-wet) and a wet, lint-free wipe to prep the nail for gel application. Use the wipe to get around the cuticle area, push the skin up, clean the sides and underneath the nails.
4. Base Gel Overlay
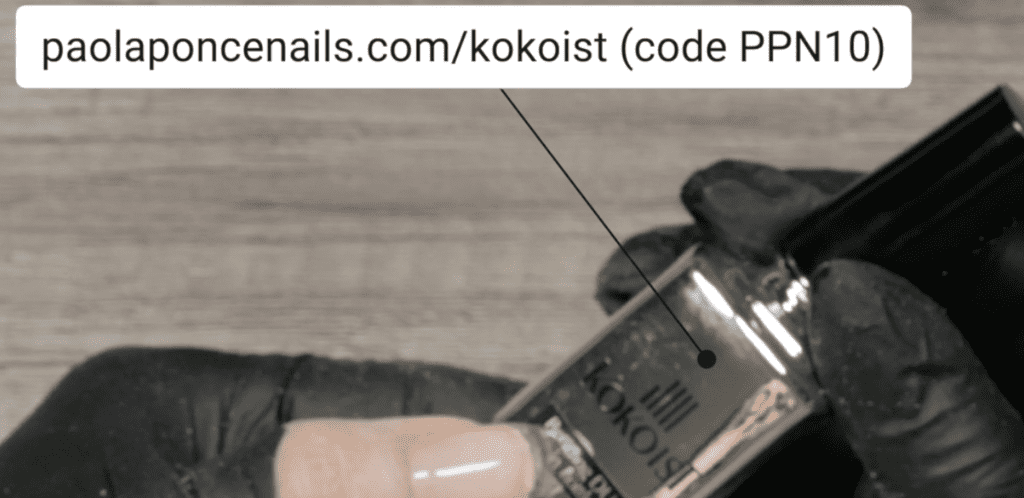
Once everything is truly blended, I am going to use base gel. All I need is Mega Stick Base (Remember to use code PPN10 for 10% discount ;)). Remember, the nail strength is not coming from the gel I am applying here; it comes from the adhesion of the nail to the Gelip full coverage tip.
Yes, the overlay help with adhesion, but if you have any air pockets or lifting, no amount of base gel or Bonding Duo in a bottle will fix it; it’s just not going to work.
Big Tip
Here’s a common mistake everyone makes. Most will grab a generous dollop and set it there, comb it down, wait for it to self-level and call it a day, right? If you do this, you leave a big gap by the cuticle area and enhance a tall apex but not this area here. Here’s how to fix it.
What I recommend you do instead is to work one nail at a time, so you don’t feel rushed by the gel running.
To fill in the gap, I want you to start with a very thin slip layer and make sure to coat the entire nail. Frame the cuticle area and pull down going over the sides.
Now grab a big dollop; I want the dollop to pull at the brush, and at the end of the brush, let it self level and then drag it down from the sides in one motion to the right and one to the left. Come back and drag it to the right and the left; avoid touching the area in the middle. You use that area to self-level in the middle once the top is smooth and take it to the lamp for a full cure.
There you have it. See how the thickness remains up here and blends with the rest of the nail. That’s how you fill that area, so your entire Gelip full coverage tip stays balanced.
Now, if you feel you need more fill and texture, you can switch over to Bonding Duo; this gel has more firmness and is more viscous, so it will help you create a taller area, but you can do it with Mega Stick Base too.
Either one, again, the strength is not coming from these gels. Is it more a matter of do you need more thickness? Or can you do it with something runnier? That’s it.
Thank you so much for joining me; I hope this helped you very much to nail that full cover tip application. I’ll see you at the next one!

Content written by Paola Ponce and Fabiola Saucedo
Loved this blog? Then I think you’ll love learning more about my journey as a specialized gel nail solopreneur in the nail industry. Click here to get instant access to my free training. These blogs are copyrighted material, and any use of this blog is not permitted without written concern first. Some of these blogs contain affiliate links that give us a small commission when qualifying purchases are made. Thank you for your support that helps us to continue creating valuable resources and content like this.


