
While applying soft potted gels requires similar steps to applying gel polish, there are definitely some guidelines to keep, but most definitely mistakes to avoid.
Today, we’ll be going over 4 of the most common mistakes nail stylists make when using Japanese gel.
Mistake #1 Over-prepping the nail.
Ok, say it with me “Japanese Gel nails, gentle prep.” I know, I know. We want to jump into the modern Russian manicure techniques and show off perfect cuticle work. BUT I’m here to tell you that that technique is not the only way to prep the nail to perfection. Especially if you don’t have the required training to offer it to clients.
Many of us overthink this step and spend valuable service time filing, cutting, and scrapping the nails when in reality, it doesn’t need it. We only weaken the natural nail, which results in lifting, chipping, or breaking the nail work. Then, we buy more products to fix new issues we might have created in the first place or even question our skills. Nope, ain’t nobody got time for that.
Japanese gel systems only require 90% alcohol, a cuticle pusher, and a 180g buffer file is all you need. It goes like this: Gently scrape the cuticle from the nail bed, push back the eponychium, remove dust/dry skin with a nail brush, gently give a few passes with 180g buffer to the nail bed, and wipe the nail with 90% alcohol. Violá! Nails are ready for application.
One of the main benefits of Japanese Gel systems is the ability to preserve the integrity of the nail and achieve healthy, natural #nailgoals. Many people avoid nail enhancements because of the nail damage, but you know what they say “It’s not the tools, it’s the fools.”
Mistake #2 Applying too little or too much gel
This is a big one! I’ve seen many of us struggle at the beginning with nails breaking or lifting, uneven nail surfaces, and not-so-shiny top coats. All this comes to one mistake, not using the right amount of gel.
Japanese gels are all about control. The base gel’s first bead marks where the gel needs to go. Then, the second slightly larger bead is what creates the structure and apex for the nail. If the nail looks flat or there are dents and bumps, you need to add more gel.
Take your time and grab tiny beads; guide them with your brush, moving slowly up and down. Turn the hand upside down to allow gravity to pull the gel to the center to create the apex.
The gel will wait for you, so don’t cure until you see the reflection of light in one continuous line without breaking. This is an indication that you have a smooth surface.
If you feel like you added too much gel or it starts spilling, use a lint-free wipe or a french brush to wipe those areas, and with the gel brush, remove some of the gel on the nail.
It might take you one nail at a time, but trust me, this will help you structure the nails and save time in the finish filing stage. If any! The nail will be perfectly structured so you can move right into the color application and top coat.
Many artists want to know the secret to faster nail services. From experience, I can tell you that my service time was significantly reduced once I learned how to control Japanese gels and self-level. To use the self-leveling properties, you need to add the right amount of gel; it takes a bit of practice to get there, but once you get it, oh-baby! There’s no stopping you!
Mistake #3: Hand/Arm Position.
This one sounds so obvs, but it took me a while before paying attention to how my nail services were affected by the position of my client’s hand. I would have difficulty leveling the gel, issues with under-cured gel, and incredible frustration. I could not figure out what was wrong.
Thank the heavens I was not the only one. Many nail pros started sharing posts and reels about educating clients on how to correctly place their arms and hands for a nail service. Yay!
It all starts with the elbow. Clients will come in excited, sit down and bring their arms close to their body to fit your work area. Here’s where you instruct them that the elbow must be away from the body and the hand towards your work area. This will instantly position the fingers horizontally instead of downwards, preventing the gel from pooling on the side of the nail.
Next is the hand. If you use a hand rest, place the client’s arm in the hand rest so the hand falls relaxed in front of you. This way, you will be able to move their hand freely, and you are not moving and bending all kinds of ways to finish the nail service.
Lastly, your client needs direction on how to correctly place their hands inside your curing unit. Most curing units indicate where to place the fingers, but ensure you tell your client to find those marks inside, rest the palm flat, and spread the fingers. Nothing is more frustrating than spending time in a beautiful service or nail art and finding under-cured gel.
You can have some type of sign in front of your clients or do a quick instructions rundown when you start the service. This will save you many headaches, trust me.
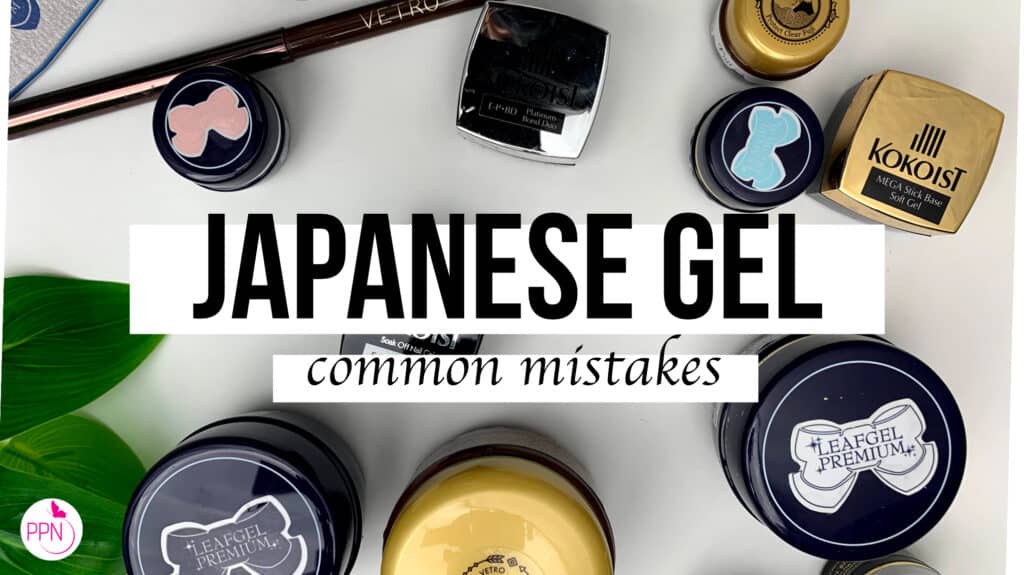
Mistake #4 Buying everything and anything.
Japanese gels are an excellent service to achieve natural-looking enhancement. Still, also, they are super cute and, OMG, the best packaging!
Before you buy everything and anything, consciously decide where you are in your nail journey and what you need for that specific stage.
Seriously, you don’t need much. I just created a video with information on what you need to get started in JGels; you can take a look here after this.
You will be bombarded with numerous up-and-coming brands, consistencies, color collections (every summer and fall), tools, and brushes. I can go on and on, but I will tell you. Please wait.
I advise starting with one brand that makes sense to you and your pocket and then training on how to work with Japanese gels. Once you learn how to use these products correctly, you will be saved from endlessly buying products to find the one that will give you perfect nails.
Practice makes perfect, so invest your time, money, and energy in learning one brand before moving to the next one. Some of us are in this industry for fun, and others because we want to make money. To make money, you need to be strategic about every decision you make about your business.
Practice, practice, and practice some more. With new nail trends and styles, I’m sure you can do them all with whatever you have on your nail desk right now. Just take the time to learn about your products, find out what you can and cannot do, practice your nail art, and mix colors before buying the next shiny new thing.
Also, reach out! There’s much free information about Japanese gel nail systems online and amazing nail artists willing to help their fellow nail artists. When doing this, always approach them respectfully and be mindful of their time. Remember, we are not paying them; they are not our besties, so talk to them accordingly.
Avoid all of these mistakes, and you be well on your way to monthly wearing gel nails.
If you want to learn about Japanese Gels and how they can define your career in nails, check out my free masterclass here.
Thanks for joining us today, don’t forget to subscribe so that you are the first to know when our next topic posts. Stick around for our next video, and don’t forget to check out the description for any free resources and current promo codes.
See you next time.
____
Content by Paola Ponce and Fabiola Saucedo
These blogs are copyrighted material and any use of this blog is not permitted without written concern first. Some of these blogs contain affiliate links that provide us with a small commission when qualifying purchases are made. Thank you for your support that helps us to continue creating valuable resources and content like this.


