It’s acting up again—that index finger of mine.
It is not uncommon to have a nail that perpetually lifts on you or your client.
If this is happening to one of your clients or a few of them… there’s actually a big chance that it is not you; it’s them.
However, after a while, the damage can be a bit more significant, where you will have to think creatively to help that gel nail stick… and yes, this may also involve having a conversation with your client.
Today, I will show you the 5 step approach I took when I just had it with the lifting and when what I do with the other 9 nails doesn’t work on this nail.
Let’s help you with that ONE nail that keeps lifting!
To fix a nail that keeps lifting… let’s start with a big, deep breath.
You’re most likely frustrated and feeling like you’ve tried it all, and you probably have. That is why I said earlier we would have to resort to “creative” ways to get this fix.
Think about it, all other nine nails are performing just fine, so it’s not your application. It is just time to think outside the box.
Here are the steps to keep that gel nail from lifting again.
Step 1 Analyze
Rather than jumping in immediately to fix that gel nail that keeps lifting by fixing it just like you’ve been doing, take a moment to stop and analyze the evidence.
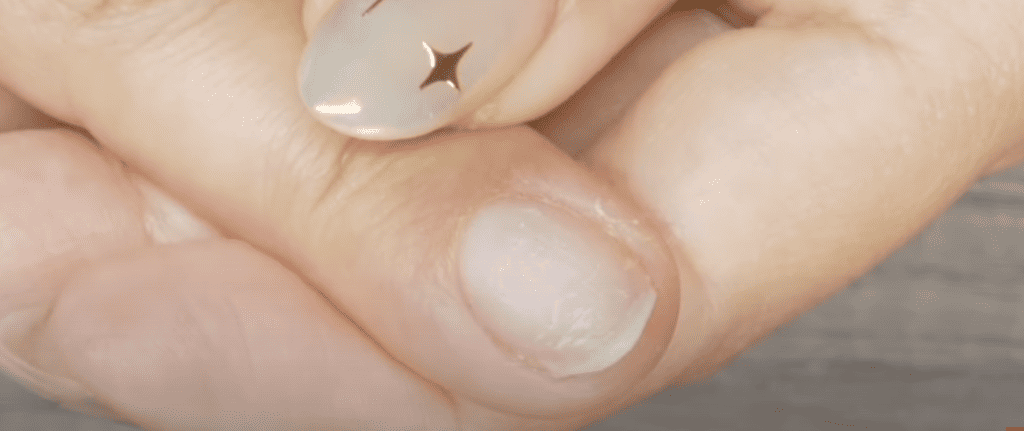
What tell-tell signs are on this nail that gives us clues as to why this nail continues to lift.
For me, the nail showed obvious signs of flexing. Whether I want to admit it or not, it doesn’t matter. The damage proves otherwise through the perforations and even the tear on the side.
If I don’t take this moment to slow down and analyze the nail, and just fix it as always. I’m just going to continue having this issue. Obviously, something different needs to happen, and at this point, it is time to consider my options.
I think that what you will come off with at this stage is that most likely, you are not dealing with an application issue, but rather a behavior one.
That nail is being stressed continuously, knowingly or unknowingly by the client, and you have to convince your client of this to make them aware that that nail is indeed being used (flexed) more than they think so.
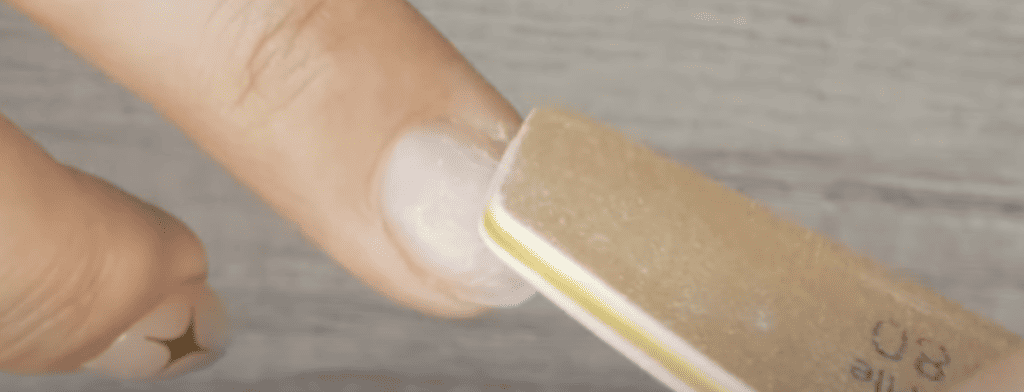
Step 2 Shorten
A nail that is too damaged has too many perforations to keep the nail stable. At every point of flexing, the gel nail weakens. Therefore, however you choose to repair it you have to take into consideration if there will be enough assistance from the gel product you are using, to help it.
If shortening it was a definite ‘no’, you could overlay the nail with a silk wrap or use Kokoist’s new gel Fixee instead of a silk wrap, as this gel already has nylon fibers.
How To Apply Fixee Gel:
Thoroughly prep the nail, apply Fixee on the designated area, and make sure it’s as smooth and even as you want it to be so you don’t have to shape it with a file before your overlay.
Then apply base gel (or a base and builder) over it.
If you’re wondering if Fixee just went right on the natural nail before the base gel. The answer is yes. You want those fibers to make contact with the breakage.
In my case, the nail had a side break and too many perforations; therefore, I shortened the nail. If you’re expressing to your client the need to cut the nail, you can give her the options of …
- shortening the nail and keeping the rest as is
- shortening all of the nails
- shortening and extending that one nail
Shortening will allow for a fresh start and may avoid the continuous flexing that the length was causing.
Step 3 Etch
You may think that etching is counterproductive as you’re scratching into the nail with an abrasive. And I like your thinking!
Yes, it is, but this will only be temporary until the nail strengthens itself.
The goal is to help the gel product adhere tighter to the nail, particularly on the new growth area of the nail.
Remember the compromised area has too many perforations, and it’s unstable. We need to focus on etching the new growth so that this area helps hold our enhancement together.
Also, remember that by this point, you’ve talked with yourself or the client, and you will be more intentional about not using this nail as the tool you were using it for.
Step 4 Bonder
Bonder will help the nail and the gel nail product adhere without the use of etching. The downside here may be that you don’t have a bonder and will have to buy one.
If you choose not to, simply take your thinnest watery base (as you want it to go through all the creases in the nail), and apply it primarily on the center or damaged area of the nail.
In this blog, you see me often reference the 3 Japanese Gel Nail brands we’ve been using for years. Those are Kokoist, Vetro, Leafgel. (our affiliate code PPN10 saves you 10%).
The thinnest viscosity gel base from each is as follows:
Once I discovered potted soft gel nail systems and knew they didn’t require a bonder, I wanted to honor that feature and try not to introduce one to my application.
Bonder can soak into the nails and cause further dehydration.
Now, because you are doing this temporarily, this will be ok, for once or twice, until that nail gets stronger.
The other thing I want to mention here is that you can absolutely consider doing both etch (step 3) and bonder (step 4), but only temporarily and after you’ve talked with your client about modifying her behavior. Continuously doing both etching and bonder can bring up this issue of damaged nails not wanting to hold on to the product on the rest of your 9 nails!
I’d suggest you pick one or the other, and only etch and bond when you’ve tried both options on their own, and also make sure it’s only a temporary strategy.
Step 5 Extensions (Full Coverage)
Well, most likely, if the nail was severely compromised, you had to shorten it. More often than not, your client is not ready to part with her talons, so the obvious solution is to extend the nail to match the other nails’ length.
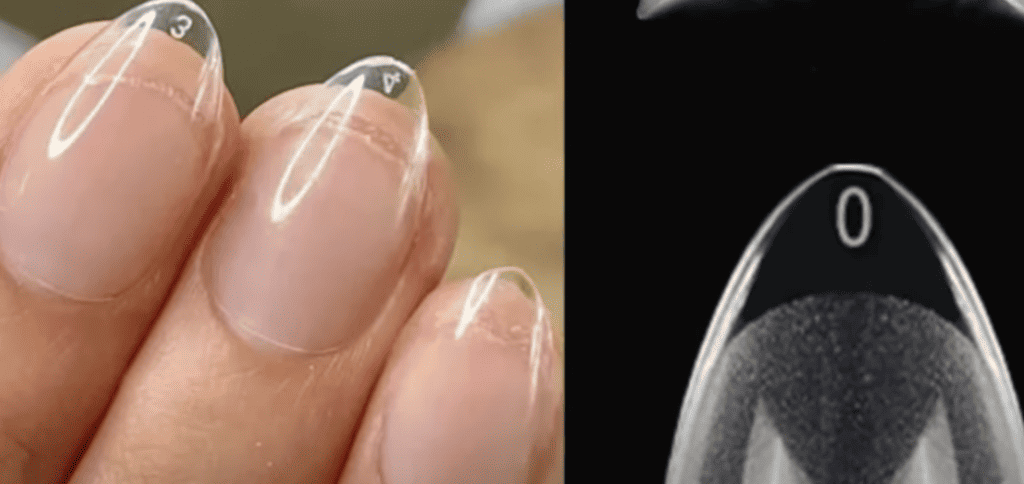
When it comes to extending with soft gel, you have options. You can do a free-form gel extension, half tip or full coverage.
ANd this is why I’m opting for a full coverage tip here, to save the date.
Because my nail is severely compromised, burdening it with some length to hold on to for the next 3 to 5 weeks may work, but it also may continue to stress the nail.
A full coverage tip will work like a “brace” by holding the nail in place and keeping it from flexing.
A half tip may also work, depending on whether the nail bed is not too short.
Whatever type of extension you go with, it should not be too long because it is, it will come across more impact on day to day activities and start lifting
In conclusion
A nail that continues to lift despite your biggest efforts to make it attach is a matter of stepping back and thinking creatively with new ways to make it last.
After analyzing the potential culprit (… behavior, by constantly using that nail.), you will probably have to trim the nail back somewhat or trim the whole free edge off.
After improving the adhesion by etching or using a bonder, the nail currently has perforations that constantly cause it to flex more than usual and then lift.
Finally, it may be time to protect the nail with a full coverage tip!
There are soo many brands of full coverage tips. Seriously, use whatever system you’re bought into, and most importantly, make sure you are using the corresponding unit to the brand, as under-curing full coverage tips is a surefire way to get an allergic reaction by leaving uncured gel underneath the plastic. I personally use Kokoist Gelips.

Content written by Paola Ponce Loved this blog? Then I think you’ll love learning more about my journey as a specialized gel nail solopreneur in the nail industry. Click here to get instant access to my free masterclass. These blogs are copyrighted material, and any use of this blog is not permitted without written concern first. Some of these blogs contain affiliate links that give us a small commission when qualifying purchases are made and help us maintain the blog. Thank you for being so supportive, which helps us to continue creating valuable resources and content like this.