I got really curious this one time, after seeing a few videos on using firm puddy gel to adhere full coverage tips, and I thought, Do I have anything in my arsenal of gel nail products, that is a little thicker to help me adhere full coverage tips
In other words, I wanted to experiment, if using a higher viscosity gel, does indeed help adhere these types of tips way easier.
And well I figured that in order to do that I would need to have some firm texture gel and that’s when I thought about DGel’s pumping gel.
And as you may already be aware of full coverage tips are super flexible plastic tips that can be applied with a soft gel onto the natural nail for an immediate gel nail extension.
This is totally just for fun, I wanted to see how this would wear , and I thought I’d bring you along for the process.
Just a quick intro to this pumping gel. It is made in Korea, and it is soft gel, which means it soaks-off. If you want to give it a try for yourself, I’ll link the distributor down below.
When working with this medium, you don’t actually need a bonder or dehydrator.
Here’s The Recipe For This Look:
Materials:
- I used the following items to create this look.
- Dgel Pumping Gel
- Lint free pads
- 90% Alcohol
- Kokoist Gelip Full Coverage tips in Short Oval
- Leafgel base
- Kokoist Mega Stick Base
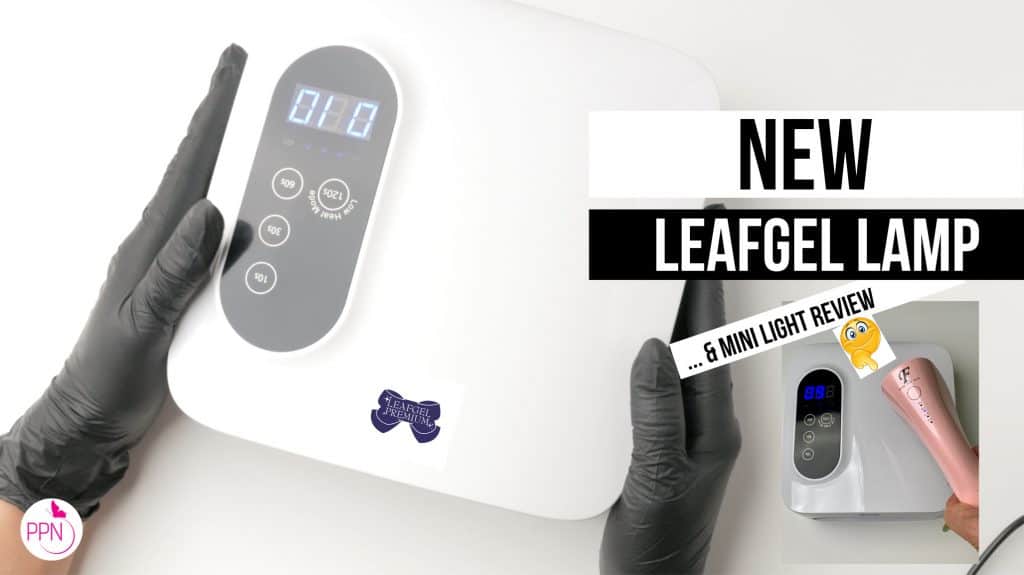
- Flash curing Kokoist Mini Light Cake
- Anemone Dust Collector
- Saeshin E File (Use code PPN5 for 5% off)
- Arbour band
- Leafgel 485
- Leafgel square brush
- Fixgel Leafgel
- Assorted high quality crystals
If you’re interested in trying any of the products above, you can use code PPN10 at Kokoist and Zillabeau for a 10% discount.
Step-by-step:
Step 1: You must first size each tip to your finger, measuring sidewall to sidewall. Each hand could be a little different to the other, so don’t assume once you’ve sized one hand, that the other will be its twin.
When you’ve found the correct tip for each finger, you could gently roll the full coverage tip to create a deeper C curve. This isn’t necessary if you have flat nail plates.
Step 2: To prep your nails, grab 90% alcohol and a lint free pad/towelette. The pumping gel does not have an adhesive component, so use a leafgel base or another base.
Spray alcohol onto the towelette and scrub the inside of the full coverage tip and your nail plate very well. Do not touch the inside of the tip with your fingers because you could transfer your natural oils, which will interfere with creating a strong bond between the base and tip. This will lead to lifting. Be sure to also clean the underside of your natural nail with your alcohol solution.
Avoid alcohol with less than 90% alcohol to water ratio, since this will leave moisture on the nail tips and contribute to lifting.
Step 3: Apply your gel base generously with a dedicated base gel brush. No thin layers here, please!
Full cure your base layer, being sure to clean up any gel touching your skin before your hands go into the curing unit.
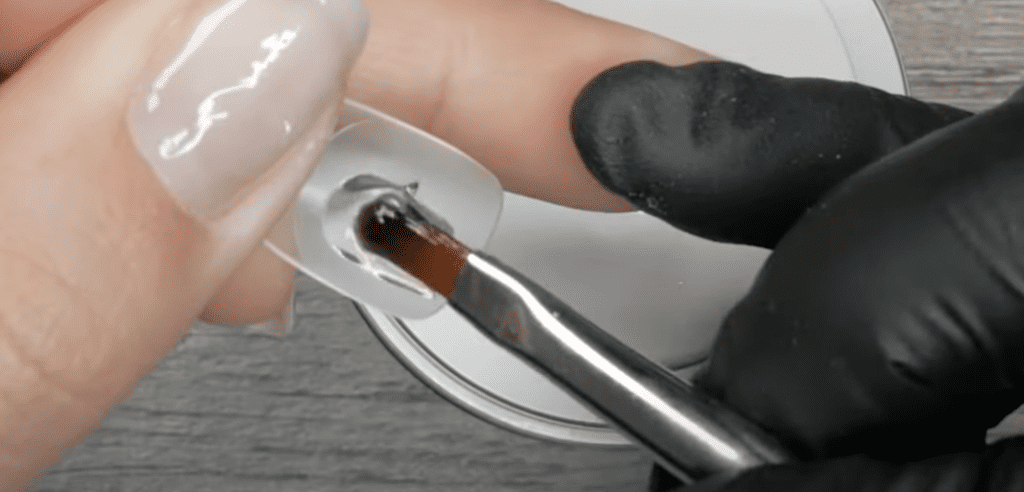
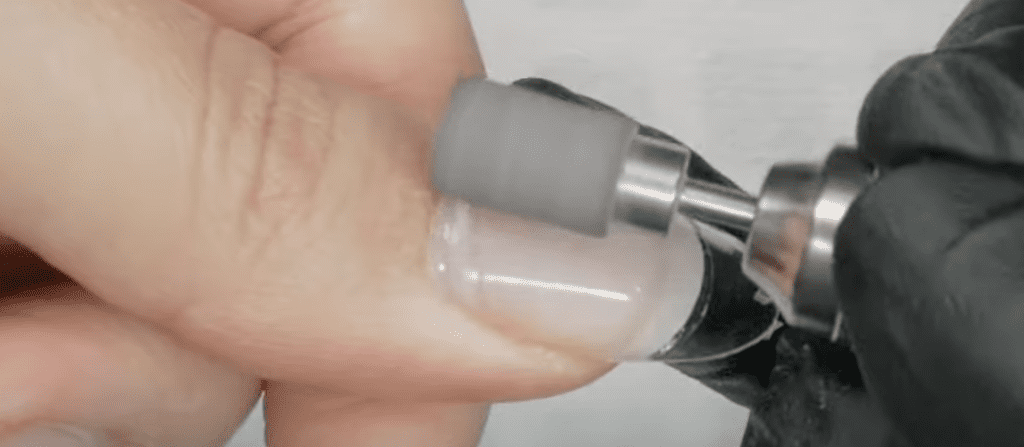
Step 4: Press down on the dispenser to release the gel from its container.
Apply the Dgel material onto the inside of the Gelip tip, avoiding trapping and leaving air bubbles in the gel.
Step 5: Press the tip onto your natural nail from cuticle area to free edge with a gentle touch so you avoid gel seeping out and onto your skin in the process.
This materials’ viscosity is much thicker than what I am used to, and you can see how the tips stay put where it was placed. This makes it a much more beginner friendly product.
Go ahead and flash cure each tip for a few seconds to secure it in place before moving onto the next finger. Don’t forget to use a full curing unit to completely polymerize the Dgel, so as to get the most out of your new enhancements and avoid potential allergies. I recommend curing for a full 60 seconds since the UV light must penetrate through the plastic and then the gel beneath.
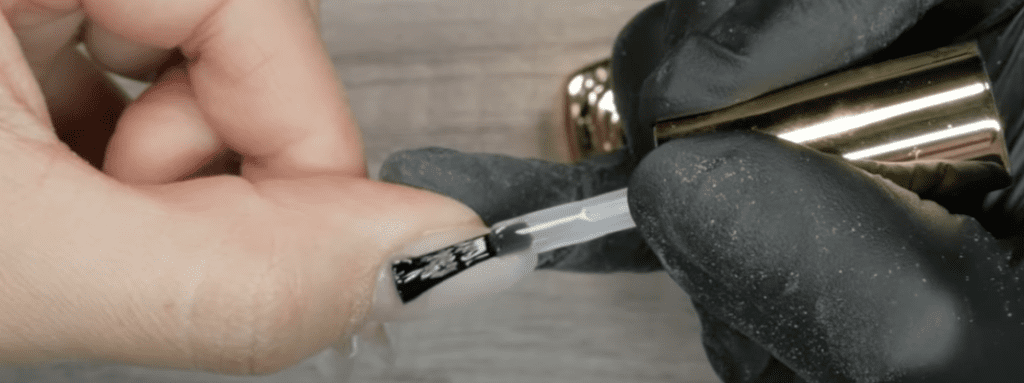
Step 6: If there are any gaps between your free edge and tip, take a liner brush and apply the builder gel into the crevices before giving it a full cure.
Step 7: Use the alcohol to cleanse the inhibition layer from the enhancements that may have seeped through before moving onto blending. To blend the tip to the natural nail with your efile, use a fine or medium arbor band, taking care to use a light and controlled touch. Use this time to also remove the shine from the surface of the full coverage tip, as this will create grip for whatever you put on top. Remain gentle and use a slower speed, the aim is to create a seamless blend, tapering the sidewall areas, not to reshape the apex. Alternatively, you could use a sponge buffer to remove shine from the Gelip if you are uncomfortable with using an efile or do not own one.
Step 8: Next, we are going to overlay the full coverage tip with mega stick base or leafgel base gel with a light touch. You are not creating structure here, that is what the tip is there for.
Fully cure this overlay for 60 seconds.
Step 9: Now you are ready for color and nailart. Creating a gradation with Leafgel 485, first apply it to the whole nail on each finger from free edge to cuticle area. Cure this layer when the gradation is complete.
Step 10: Use Fixgel by Leafgel to adhere stones, creating a bejeweled look that feels like wearing jewelry. Place these to your liking and enjoy the sparkle of the crystals decorating your nails.
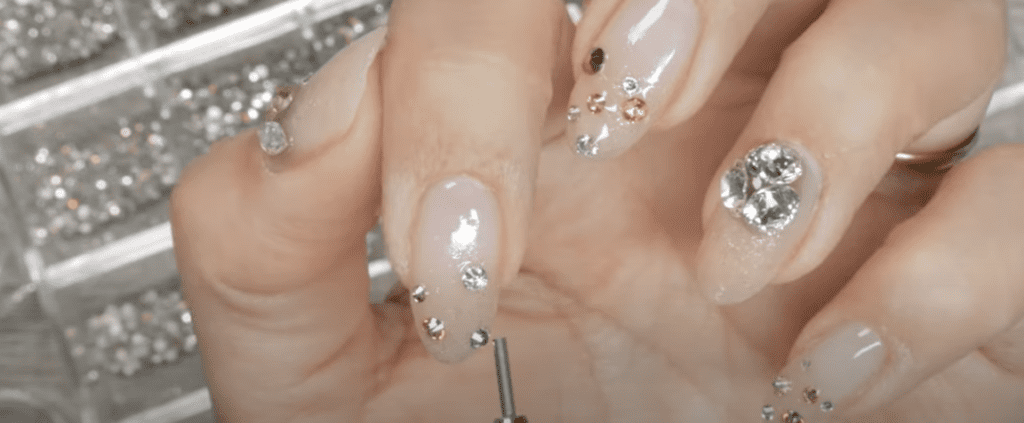
Step 11: Finish with a top coat, avoiding the top of crystals as this may dull their sparkle, and fully cure each hand. Be sure to wipe the inhibition layer away with cleanser/isopropyl alcohol. Your gorgeous new nails are ready to shine.
And here’s a fun piece of news, since the recording of this video, Kokoist released Gelip Bond. This is an adhesion gel specifically designed for adhering full coverage tips, the Kokoist Brand is called Gelip. And the biggest upgrade to this gel (P.S. Before creating this gel, you would attach the full coverage tips with Kokoist Mega Stick Base), so the biggest upgrade is that this gel has a thicker viscosity, making it very similar to the higher viscosity gel we used today, mind readers!
Thanks for joining us today, how did you like today’s look? Let us know in the comments below. Bye for now.

Content written by Paola Ponce.
Loved this blog? Then I think you’ll love learning more about my journey as a specialized gel nail solopreneur in the nail industry. Click here to get instant access to my free masterclass. These blogs are copyrighted material, and any use of this blog is not permitted without written concern first. Some of these blogs contain affiliate links that give us a small commission when qualifying purchases are made. Thank you for being so supportive, which helps us to continue creating valuable resources and content like this.
![5 Must-Buy Efile Bits for Soft Gel Nails [Japanese Gel]](https://paolaponcenails.com/wp-content/uploads/2020/05/bitsthumb-1024x575.jpg)