
Where do you start when the curiosity for starting a gel nail business grows?
Do you start with nail colors? Nail art supplies? Equipment? Uhm…
Exactly. We could just go on a random shopping spree.
SO I want to make this video and list out the things you need by putting them into 3 categories.
And because my specialty is in gel nails, the essentials we’ll be curating are for those stylists also wanting to specialize in gel nails.
So, there are 3 categories that I want to divide your needs into:
- 1 Table Equipment
- 2 Nail Supplies
- 3 The Extras
And these 3 are in order of importance. So like what is the most essential.
Because let’s be honest. Who doesn’t want an excuse to go on a nail shopping spree? But take it from someone who at least took up nails in her first year; I literally was just at the nail supply store every week. Wasting money (primarily because I was not specialized). Still, sure I got some retail therapy also.
But as you know, one of the things we like to do here is not just to get you into doing nails but to streamline you to your goals in this industry, including your financial ones. And even if you’re just a DIY, I want you to know exactly what you need so that you can indeed DO IT YOURSELF, and not DESTROY IT YOURSELF.
So if you’re not spending your money strategically, as I will show you in this video, you may waste more time and money than you need to.
So you’ll want to be paying attention, taking some notes, or even saving this video to rewatch later.
Let’s begin with everything you need to get started as a nail tech.
So what table equipment do you need to get started with nails?
1. The obvious a nail table
As far as what to buy, anything with enough room horizontally works. The most important thing here is making sure that the table is not super wide; otherwise, you will reach over, and your ergonomics will get out of sync.
2. Two chairs
If you are working on yourself right now, you probably won’t need it yet, but trust me, this nail thing is addicting, and sooner or later, you will find yourself looking for a second chair.
3. A table lamp
You don’t have to get super expensive at the beginning. Some people use the lightbulb ones, which give the nails the popular halo effect on pictures, or the lamp that’s still a favorite in the industry, The Daylight Slimline. The thing is, this lamp’s price has moved to $200. If that is not an option for you, you can hop on Amazon and look for a
4. A curing unit.
I recommend two if you specialize in gel nails once you get really busy with clients. But for the time being, one is def a must.
Listen, I know these can get expensive, but I will give you my rule of thumb. Get the lamp from the production company you use the most. If most of your clear gels are from Kokoist, go for the LeBlanc or the Kokoist corded lamp. If you have Leafgel gels primarily, then get the Leafgel curing unit. If you get your products from Amazon, get the lamp from that distributor. The brand will often have the curing unit that works best with its gel products. This is crucially important because you cannot ensure long-wearing nails if you cannot guarantee a proper cure.
I always say, if your nails don’t stick, your clients won’t either, and there goes your $ walking away from you… so let’s make sure we are curing properly with a good trusty curing unit.
5. Dust Collector.
Please do yourself a favor and get a dust collector. It is not comfortable having nail dust all over your face and work area. That dust comes from dry skin, nails, and gunk under the nail (Yuk). This item is non-negotiable. I want you to save up for a dust collector instead of buying 10 more colors.
6. Covered trash bin.
I don’t want you getting the 13-gallon kitchen ones lol. You need a small one next to you to throw wipes and small disposables during your services. Remember, trash goes out daily, so you avoid foul odors.
7. Armrest.
I didn’t really use one in the salon because of my table set up, but I do see them on other tech’s nail stations on social media, very popular. I added this as an extra because you might be restricted to working in that specific armrest area. This could lead you to work tensing up your arms and shoulders or lousy back posture, so I will leave it to you to decide if you need one or not.
Let’s now move on to the nail supplies you’ll need to get started on nails.
Now this category is going to have two sub-categories.
- #1 not-so-fun supplies
- #2 fun supplies.
Let’s start with the not-so-fun supplies. These are for your personal protection, and whether you’re seeing clients or just DYING, you need to invest in these.
Not -so-fun nail supplies.
1. Disposable table napkins.
Yes, you can use disposable kitchen napkins and blue napkins for wiping car windows and mirrors. Still, I cannot recommend enough dental bibs. The beautiful thing about dental bibs is the plastic backside, which protects the surface you are working on and still is very absorbent. Also, you can use the backside as a palette, ;);).
2. Face masks
Nail techs have been using masks for years not; it’s not a 2020 invention, ok? You should use face masks regardless of whether you have a dust collector. Again, nail dust, dry skin, and nail art flakes fly everywhere when working, and allergies are real, my friend. Some nail techs replace their mask after every service. That’s up to you.
3. Gloves
Even if you are the cleanest careful person, you can get your clients’ nail dust and skin on you, and if you are working with gel, you can’t wipe it off unless you use alcohol. This could severely dehydrate your hands if you are wiping them, or you could develop allergies (and allergies develop super-fast, I mean after a couple of times touching your skin, fast).
FUN nail supplies:
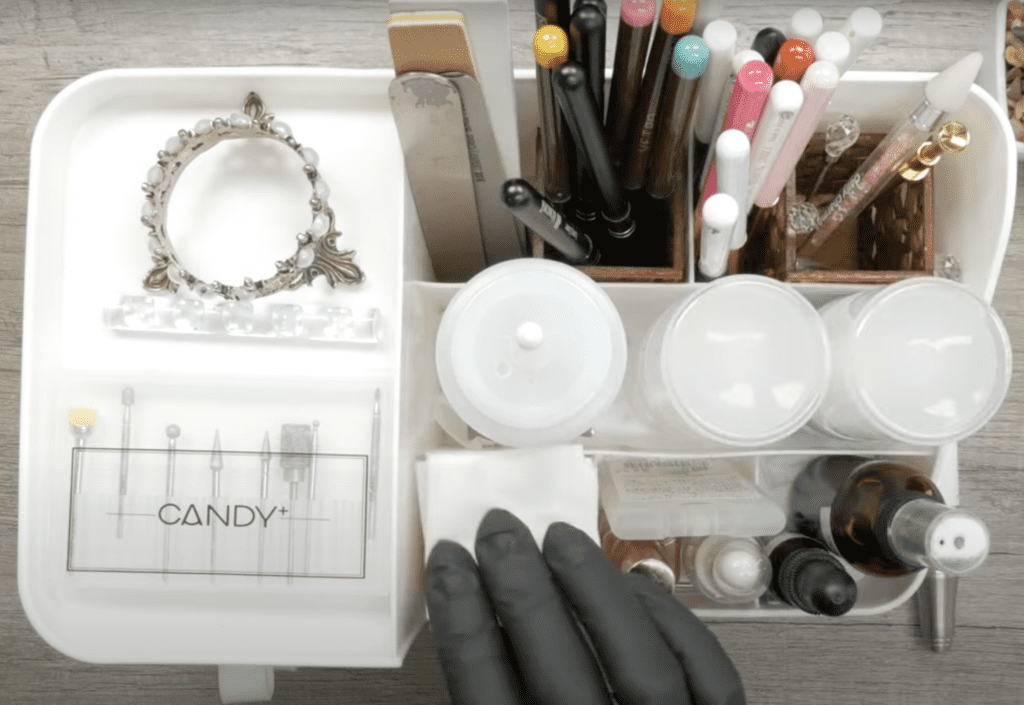
1. A nail caddy or tray.
A nail caddy, a home for all your nail materials. So my brushes, solutions, pallets, wipes, files, efile bits, brush holders, implements, etc., all live in one place. This helps me stay organized and efficient. I love this one from Amazon, and if it breaks or something, I cannot wait to get a new one. It’s that good.
2. Solutions.
Definitely need alcohol, acetone. I recommend two forms of alcohol containers: A spray bottle to spray the nail and keep it uncontaminated and a pump bottle. The pump is to use with brushes during your service. This way, you have a flat surface to soak your brush when doing nail art. Very useful.
The spray bottle is used to disinfect or cleanse your client’s nails. I know this is an extra thing to have, but I think it is crucial to avoid allergies for your safety and the clients.
You might have other solutions… depending on the nail system, you are using, like a bonder or dehydrator. Since our niche is on Japanese gel nails, most of them do not require the latter.

3. Files & Buffers.
Now, about all states require you to use one file, one buffer per client and that can get expensive, I know. However, if that is not within your budget at the moment, I recommend mechanisms like the ones where you can peel off and on the grit side of the file and then dispose of them after every use. I tried the ones from Stalecks, one of our beloved brands, but there are other brands that carry these types of files.
Another thing you can do is get the small blocks you can find at the drugstore. Just make sure they are not super gritty, they need to be smooth, especially when working with Japanese gels. You only need a small amount of grit.
4. Towelettes.
I know the nail community is rigorous on finding THE lint-free wipe but hear me out. If you haven’t watched that video I made explicitly about nail wipes and towelettes, make sure you do after this video or before you purchase your wipes (Best wipes video here). I have been using 2 x 2 dental gauses for many years without any issues.
Of course, like any type of wipe, if you wipe a dry brush on a dry towelette/wipe, you will break the seal and get lint. Make sure to wet the wipe with alcohol before using it with brushes or the nail plate.
5. Gels.
My golden rule: Start with 1 brand, maybe 2, and later on, you could add a third one, but no more than that.
Clear gels and colors, just a few. If you a just starting, I would say around 10. Unless you are a nail art specialist that does animated painted art or a salon owner, you don’t need a whole collection of colors. 80% of your clients will stay in the nudes, pinks, and reds realm. That’s it, so use your money wisely and strategically.
6. Stir Stick.
There are many cute versions of these, you can even use a toothpick to stir your potted gels or clean the area around the nail. I like using these with the spatula end on them. I can use them to mix colors and glitters too. Super cute to the eye too.
7. Brushes.
This is a popular question. What type of brush? How many brushes. And I will tell you: One for your base, builder, colors, topcoat. You get to pick what shape fits you the most. Some people are more comfortable working with flat square brushes, others like oval brushes like me hehe.
I know this sounds like many brushes, but 1) You get to go shopping! And 2) it is essential to have a separate brush for the ones mentioned above. To avoid lifting issues, you need to ensure you are not contaminating your gels, especially base, builder, and topcoat. These gels have different components for various uses, so please do not cross-contaminate them.
8. Cuticle oil.
Is this optional? I don’t think so. You should definitely be adding a drop of cuticle oil to your finish set every time. Again, who doesn’t like shopping? There are a ton of fun smells, colors, and textures, so have fun here.
This is an essential tool because you need to add moisture back to the skin and nails once you are done with your service. This will make your set look even more beautiful and give the skin the moisture needed to repair itself, and make your set last longer.
9. Implements.
Clippers, nippers & cuticle pushers. If you see multiple clients a day, you need a few sets of these. If you are disinfecting every day, like you should, you need as many sets as clients as you have.
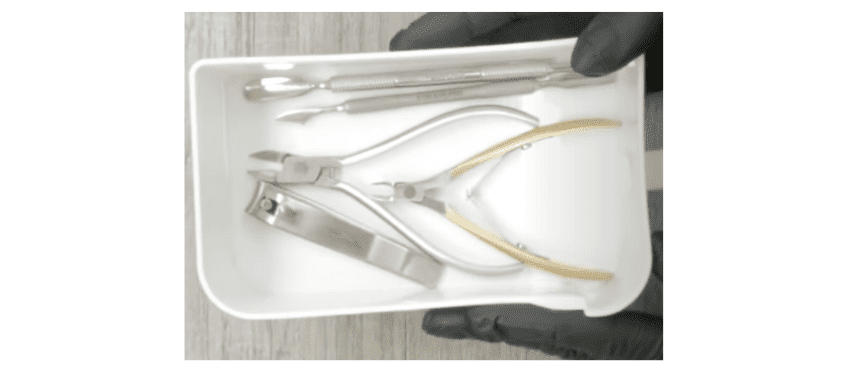
I recommend you get curved nippers for natural nails and straight nippers for anything else. If I had to pick one, I would invest in straight nippers. They look like cuticle nippers, but they are for nails, natural nails, thin gel, and plastic nails only.
Cuticle nippers, people usually ask me what jaw size, and I found myself working comfortably with the 5mm ones. The 3mm were too small, I was doing more poking than cutting, and the 7mm and up were just too big, and I was cutting more than I wanted to.
You can use pretty much anything for pushing the cuticle; I know I didn’t use anything fancy at the salon, but I would now. I like to use the Stalecks pushers now because of the pusher side. It’s very thin and sharp, perfect for cleaning the nail plate from the cuticle and lifting the eponychium. It gives you the Russian manicure look we all love. There is no seed for excessive cutting skin, ok?
Stalecks is the brand you want to use for most of your implements. High quality, sharp, non-rust tools, super recommended.
10. Disinfectable Brush.
You need one that is disinfectable, no matter where you are working from, ok? Using a nail brush from client to client is not ok. You are not passing fairly dust lol.
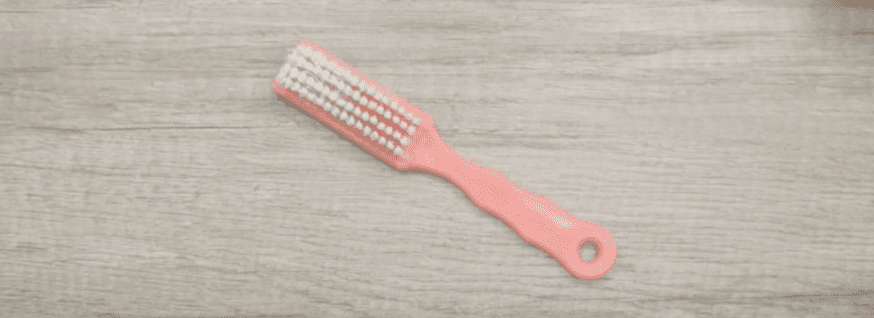
I know of a nail artist who uses disposable toothbrushes as nail brushes. Each client can have one, and it’s not breaking the bank. I think that’s a super cool idea. Again, make sure your brush is disinfectable.
One thing to note, brushes like make-up brushes are not disinfectable so save those for dusting glitter or flakes, ok?
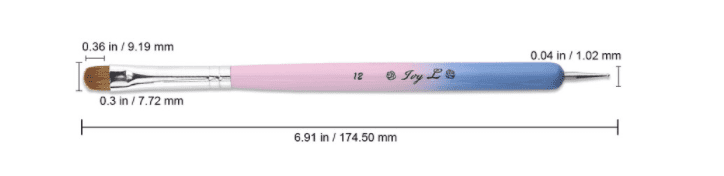
11. A French Cleaning Brush.
AKA Oopsie Brush. I seriously cannot live without this brush. You can use the ponty side to clean around the nail or use the brush side to fix lines. Yu can find this one from Amazon.
So that sums up our second category, nail supplies.
Now let us look at our last variety:
The extras.
1. Cotton and foils.
This is where cotton is allowed and actually comes in handy. Do not use cotton for wiping the nails or your brushes if you want to avoid the ultimate lint-fest. Cotton is absorbent and you want to use it for soak-offs. Use a small piece of cotton (the size of your nail) and soak it in acetone, then grab a piece of foil and wrap the cotton and the finger tightly, making sure the acetone won’t evaporate.
As for acetone, I like to use conditioned acetone from the brand Zoya, not soy lol. Japanese gel is a soak-off gel and it doesn’t require super-strong acetone to break it down. As long as you file the surface, the acetone will penetrate for 15-20 minutes and then scrape it off.
A good tip is to add some heat or warmth to the hands to speed up the process.
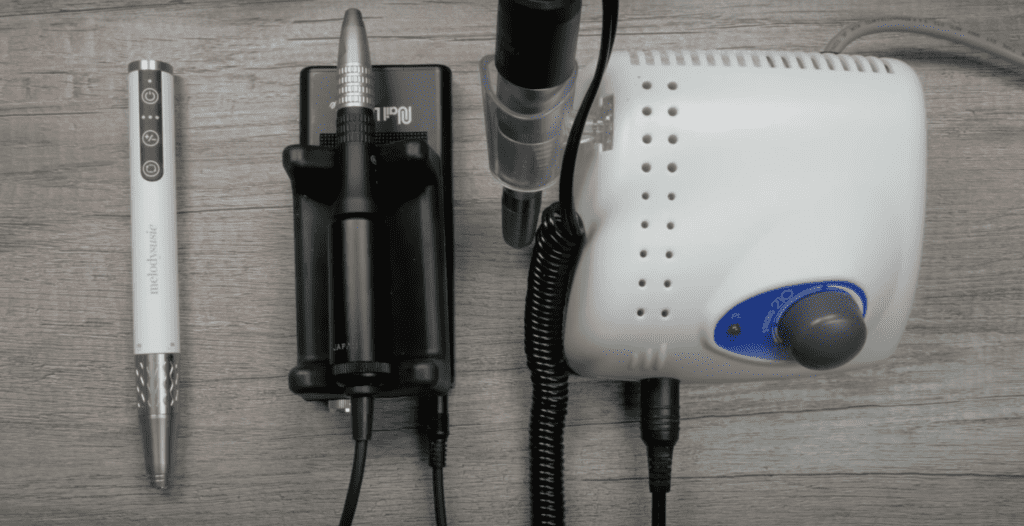
2. Efile.
Yes, this is extra! Financial and time investment!
If you are using an efile, this is just another training level you need to safely and effectively use this tool. I’m just like you. If I see it on YouTube, I think I can do it. Still, you don’t want to use it on yourself and detach the nail from the nail plate, your eponychium, or even worse, your clients. That’s permanent damage. Please make sure to do some type of training before using this tool. If you want efile 101 video, I have it right here for you.
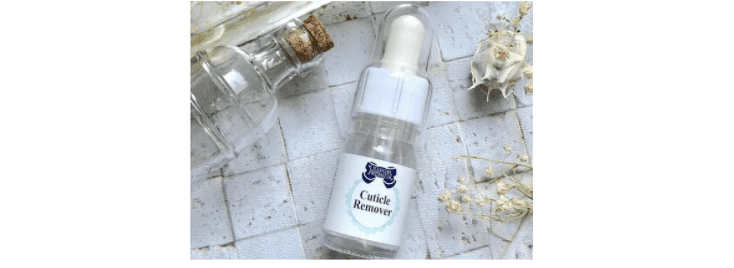
3. Cuticle Remover.
This is one that I don’t use all the time. I have it handy for clients with stubborn cuticles, but I am a dry manicure girl for sure. If you use cuticle remover, I recommend the one from Leafgel. It’s full of nutrients and wonderfulness to instantly remove cuticles and leave hands soft and supple.
If you use it, use pure acetone to wipe the nail only, this will ensure you have removed all the oils from the cuticle remover.
4. Brush Holder.
I am guilty of not always putting my brushes in the brush holder, but it is an excellent tool to keep yourself organized and clean. When you switch from brush to brush, they roll on the table, touch other things, and soon become contamination-city. Get one of the stick non-expensive brush holders or a fancy crown to stay on top of your game.

5. Palette.
A nail palette is suitable for nail art, wiping, and cleaning brushes, and is just a good tool. There are many out there made of silicone, acrylic, or metal. Small ring ones or large ones like a mouse pad. Some people even use their nails as a palette or the back of a dental bib ;).
They are very inexpensive, so make sure you are using something and not the bareback of your hand or any skin. Use a palette.
6. Nail Tips and/or Form.
There are nail forms if you are super skilled and confident sculpting nails, the super-popular full cover nail tips, apply-set-go kind of vibe. Then there are half-tips, which, believe it or not, are still my favorite; especially with soft builder gel, extensions come out so beautiful and long. They are strong and work great with nail bitters and everyone else. Love them.
7. Nail art storage… Yes, it’s extra!
This might be a controversial area, but I will share my thoughts. I think storage is necessary because you have gels. Where do you place them? Not on your table. You can use small drawers like these to store your gels; one of the beauties of potted gels is that they are compact and fit almost anywhere.
Now, if you offer nail art such as glitters, stickers, charms, crystals, etc., invest in some type of organization tools when you have the budget. This will help you plan your sets better and not forget about those decals or charms you got last year; I see you.
Well, I think I got it all. If I missed anything, let me know below in the comments section, and maybe we’ll add it in a part 2 video.
I’ll do my best to provide you with links to everything I’ve mentioned below. If I miss linking you to anything, just drop a comment below.
- 🔺Gel Products: https://paolaponcenails.com/kokoist (code PPN10) https://paolaponcenails.com/leafgel (code PPN10)
- 🔺Implements https://paolaponcenails.com/nashlynails (code PPN10)
- 🔺Amazon Favorites https://paolaponcenails.com/amazon
- My favorite nail equipment:
- 🔆 Saeshin Nail Efile: https://paolaponcenails.com/saeshin (save 5% w/ code PPN5)
- 🔆 Anemone Dust Collector: https://paolaponcenails.com/anemone (save 10% w/ code PPN10)
Stick around for our next topic; otherwise, I’ll see you next week. Bye for now~
Please note… These blogs are copyrighted material and any use of this blog is not permitted without written concern first. Some of these blogs contain affiliate links that provide us with a small commission when qualifying purchases are made. Thank you for your support that helps us to continue creating valuable resources and content like this.


