The invention of nail gel has been absolutely revolutionary.
UV curing nail gel was invented back in 1988, yes over 30 years ago.
High shine finishes, a natural look and feel, and instantly dry nails… Probably the top three characteristics that have us going… Yes, yes, yes! And back for more of that gel nail goodness.
But let’s face it, over the last 5 years or so, gel nails have gotten a really bad rep. And as an exclusive gel nail only nail tech I often feel the need to chime in, and in a way defend my little corner of the industry.
And I have to say, the bad rep gel nails obtained over these last few years has to do primarily with misuse among the DIY community… BUT poorly manufactured products are to be blamed also.

(… And sure, also many thanks to the media for sending people into a frenzy, about curing units causing cancer. They don’t, and I’ll link you down in the description box below to resources debunking that myth.)
But before you misunderstand me. I’m not annoyed or even bothered by the DIY community wreaking havoc on our industry. I love the DIY community, and in fact I believe that if the correct information about gel nails went viral, many of those DIYers would love nails so much we would have so many more talented nail enthusiasts going pro!
So, after reading this post, I want to encourage you to share it!
You see, I myself started as a DIYer, and I was also buying random crap online. Primarily because there was no good reliable online education. Free or paid. Everything I read on the web or watched on YouTube suggested I go at this blindfolded or that I invest in a nail program.
I felt a need to do this “the right way,” and so I enrolled in a nail program… only to, 3 months later, learn very little about gel nails and still utterly suck at doing nails. Like, I didn’t even feel like a pro polishing nail with regular nail lacquer.
And so 11 years after that experience and many accomplishments since then, I sit here today, doing what I can to give you industry insight in the form of free and paid education to get you to at least tip your toe in the water (water with proper information of course), and see what doing nails professionally actually entails, so that you don’t have to give beauty school all of your earnings just to see if this is a viable path for you.
So a long intro, I know, but I just want to establish the fact that I am not against DIY use. If anything, I am against untrained DIY use. That’s what gets DIYers in trouble, and I hope that after this video you can see the importance of training even as a DIYer, or to consider simpler and safer alternative products for doing your own nails.
And that’s what I want to do today. I want to identify the safest nail products for DIY manicures.
Let’s begin.
🌿Who or what is a DIYer?
DIY stands for doing-it-yourself. So if you’re DIYing nails, you’re doing nails on yourself.
Even though I have 5 years of salon experience, and 5 years of teaching experience… guess what. I’m still a DIYer.
I don’t have my own nail person.
I sit here, once a month doing my own nails.
But what’s the difference between you at home doing your own nails, and me sitting on this side of the screen? I am trained, and I have put in the reps after that training to apply my work like a professional.
Over 10 years ago, I stopped wasting time trying to piece together the process for proper gel nail application, video by video, follow by follow. I paid for the training in the form of a nail program for state licensing, and various supplemental nail courses. I then also narrowed my focus to using only 2 or 3 brands. Which believe it or not, that is a lot of brands to try and learn and master. But narrowing your focus is so important if you want to have success, in anything, really.
And if you want to narrow your focus down also and learn what brands I use, I go over the power of specialization, or finding your niche, in the nail industry in my free masterclass, which I’ll link you to, down in the description box below.
So, all this to say, I am a trained DIY user. And you can be too. There are many application courses you can take without being licensed, because actually being licensed is not required around the world to do nails. And also, being licensed doesn’t give you the know-how to apply nail enhancements, like nail gel.
Now if you want to provide services to the public here in the US, then yes, every state requires you to be licensed to do so. So do so, if you will be providing services to the public.
For the context of this video, I want to talk about DIYers with LITTLE to no training in doing nails, or using nail products, and what the safest options are for DIY use.
If you are a DIYer with little to no training, then it is in your best interest to work with products that if you made a mistake with, or you misused them, they would not cause you harm. Harm in the form of physical sensitivities or allergies, or other physical harm like hurting yourself with tools.
This is the measure for me to determine “safest” nail products. Again these would be products hard to make a mistake with and injure yourself with.
I also want to address the specific area on the finger that you put products on.
🌿Nail products go on the nail plate. The hard material that grows out of your finger’s matrix.
The nail plate is primarily keratin. Keratin on your nail plate is dead, and it is a very strong material that actually shields your skin, like your nail bed from absorbing chemicals. So if you keep chemicals on the nail plate only, and those chemicals are properly cured or dried on there, and you also don’t destroy that nail plate with tools. The potential for allergies or injury diminishes significantly.
I know this is a long introduction but you need this context.
With this in mind now, the following is a list of products suited for those DIYers with little to no experience using products on themselves:
🌿Safest Nail Product #1: Nail Lacquer
Good old regular nail lacquer from reputable brands, is expert approved to be the safest option to apply onto nails.
But what is nail lacquer?
Nail lacquer is a solvent-based coating containing pigments.

It is applied, simply by painting on the product on the nail plate.
The prep before applying nail lacquer is very simple.You merely need to push back the cuticle area with a tool and cleanse it from natural nail oils and debris with an alcohol soaked towelette.
To remove, you could use acetone, or a non-acetone remover. You simply let a soaked towelette or cotton ball sit on top of the color for a few seconds, and wipe it downwards. Repeating this step as needed.
For safety precautions, working in a ventilated room is just about all you would need to take action on, to protect yourself. Nail lacquer ingredients including alcohol and acetone are highly volatile, which means they evaporate and get into the air you breathe very fast.
Now I have to mention a fun fact…
You may often see gel nail products touted and marketed as “non-toxic”. The funny thing is that if you read what all of those ingredients are (show the list on the screen), those ingredients are most commonly found in nail lacquer, NOT gels.
So, nail gels as a whole, would be “non-toxic” according to that list of toxic chemicals… because those are not chemicals that are even needed to create gel.
The recipe for creating gel is actually quite simple. There are only 4 key components, and it actually takes a lot more chemicals to develop nail lacquer from what I have seen, than it does to create nail gel.
With that said, check your nail laquer for those chemicals. And the toxicity from these chemicals comes primarily from inhaling their vapors, or eating them… If you bite your painted nails, or chew off your polish. The toxicity does not come from the product being applied on the keratin on your nails.
This is why nail polish for children became such a niche. Because many children would bite their nails and chew that polish off-of their nails.
(I know there are also some guilty adults in the crowd.)
🌿Safest Nail Product #2: Press-ons
Press-ons have never been more popular than they are now. And what I love the most about their popularity, is that you can support artists all over the world by buying press-ons from them.
Now, press-ons have also gone commercial. And you can get them for cheaper at a drugstore or what not, if that’s your vibe.
What are pres-ons?
Press-ons are full coverage plastic nail tips that are pre-designed or coated.

Many nail artists have been able to pursue their dream of painting on tiny canvases without actually holding hands with humans by creating their nail art on press-on tips.
Press-ons are applied by first sizing your nails to the correct tip size, prepping the natural nails, and then gluing the press-ons on to your natural nails.
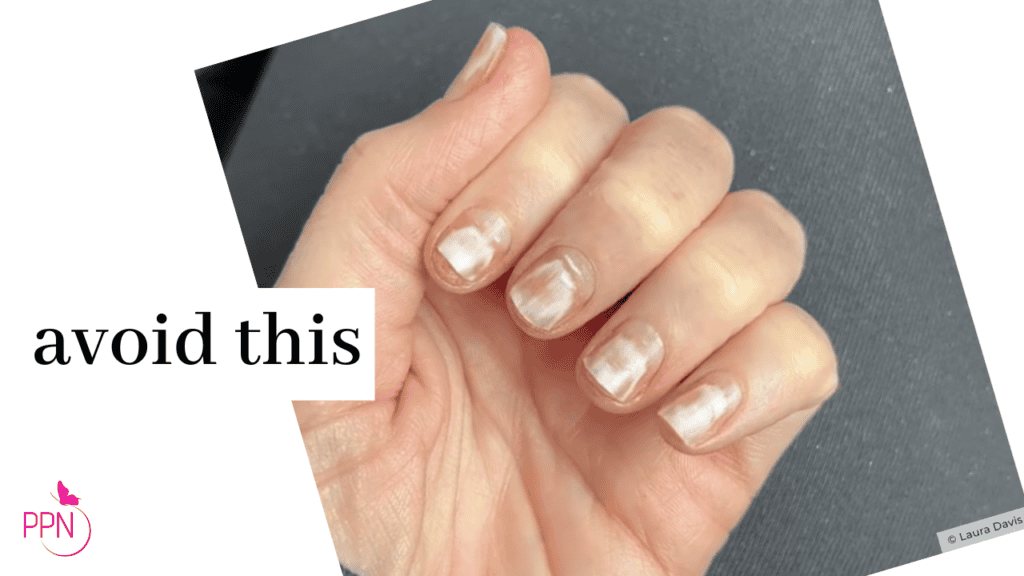
This is very important: Do not use gel glue, that requires a curing unit to glue on colored press-ons. A curing lamp’s light does not beam strong enough to fully cure gel through colored tips. If you do this, you will sensitize yourself, and most likely make yourself allergic to nail gel, and other acrylates for life.
Colored press-ons should only be applied with nail glue, which is cyanoacrylate-based.
To prep your nails for press-ons, start by pushing back and cleaning the cuticle area.
Then remove the shine from off of the natural nails with a buffer gently. If you use anything more abrasive than a sponge buffer, yes they will last longer, but you will incur damage when you go on to remove those press-on nails. Gentle does it.
Then proceed to applying a bit of glue either on your nails or the tips, and pressing the tips on to your nails.
Now, something to note about nail glue.
Nail glue is a type of resin. Resin is used to make gel, therefore if you are allergic to gel nails, you may have a sensitivity also to nail glue’s resin. Cyanoacrylate.
As with nail lacquer, a properly ventilated room will help dissipate fumes from the nail glue.
If this is you, it’s not game over.
You can apply press-ons and experience long wear by using sticky tabs.

Sticky tabs have come a long way! Depending on which you get, they can make your press-ons last weeks.
To remove press-ons, you will have to soak your fingers in a mixture of warm water, soap, and oil. And after a few minutes of soaking, you would gently start to maneuver them off of the nail plate, as gentle as possible.
🌿Safest Nail Product #3: Nail Wraps
Nail wraps are another great way to support nail artists. There are a number of companies that collaborate with nail artists to design nail wraps.
Nail wraps most often are plastic sheets with engraved digital designs on them. They wrap the entire nail plate. And I want to say that sometimes they can be made from nail polish also.
Nail wraps come and go, but I think they are underused, and not as popular as they should be.

They can be applied quicker than nail polish, and since most often they just need a top coat, they can be dried nearly instantly, and even better little to no fumes to inhale.
Because they are like a decal on the nail, they can strengthen nails by holding the layers of keratin together also.
The process for prepping the nail for application is similar to that of press-ons.
Size each wrap to your nails, clean up the cuticle area, and cleanse the natural nail of oil and debris with alcohol.
Once you stick the wraps on, you cut them to the length of the free edge by gently filing off the excess.
And then you paint a layer of regular top coat on.
Give nail wraps a thought, I think they could be super fun.
🌿Safest Nail Products #4: Gel Polish systems
Hear me out. If you want DIY gel nails because you just want your very own nails polished for long wear, and instantly dried after painting them, AND no-fuss gel removal. Gel polish systems are the way.

HOWEVER, if you want detailed cuticle care or gel removal with an efile machine, structured gel nails, extensions, or layered or complex nail art you only have two options, in my professional opinion:
- Train in the products you are interested in for proper use or,
- Support your local nail tech, and make a budget for getting your nails done
Any of the services that I just mentioned…
I’ll mention them again, efile manicuring, structured gel nails, extensions, or layered or complex nail art should be exercised with trained-use only.
The only DIY gel nail service that seems the safest to me is gel polish. The process of using a gel polish formula to merely paint your nails on.
Gel polish is its own thing. Just because a nail gel is in a bottle, it doesn’t mean it’s a “gel polish”. I wish we would all just stop calling bottled gel, gel polish.
Gel polish is gel with nail polish-like ingredients. I.e. solvents. Solvents are thin, watery in viscosity ingredients like acetates- most common butyl acetate, and ethyl acetate.
With that being said, you must still use the minimum safety precautions of a gel nail system when using gel polish, which are:
- Keeping the product only on the nail plate
- Buying from a long-standing reputable brand
- And purchasing the curing unit of that particular brand
Gel polish is not a pure gel product, in the sense that some of its liquid ingredients are not resins. It’s primarily resin based, but with a number of other non-resin liquid ingredients.
Gel polish systems also have less monomer in them than pure gel formulas.
To my understanding, the most allergenic component in a nail gel formula is its monomer. Monomer is needed to make nail gel. It is an ingredient used primarily for adhesion and dilution.
Examples of monomers are HEMA, HPMA, IBOMA and a few others, but these are some of the most common in the nail industry.
The learning curve for gel polish systems is super entry level, as all that is required is to polish the product on, and cure it, the prep is the same as you would do for applying press-ons.
Gel polish is less strong than pure gel systems. It is a very thin viscosity gel, and its purpose is to merely provide a polished look. Its solvent ingredients allow it to easily soak off in acetone also. These characteristics make gel polish more suitable for DIY use, than for professional use.
A gel polish manicure typically lasts problem-free for an average time of 10-14 days.
DIY products should last less than professional products.
As trained professionals, with safety and proper application knowledge, we want as much as a properly developed “full strength formula” as we can obtain. Why? Because we charge people hard earned money for a gel nail service, and also because we are trained on safety precautions.
But just about every professional industry offers consumers a lower strength formula for DIY use, and for me, gel polish is that lower strength formula for DIY gel nails use.
Think of teeth whitening solutions, hair dye, lash strips, and any other chemical beauty procedure that is available for DIY use while being effective but at a lower risk of harm for DIY use.
Again, if you want to DIY builder gels, extensions of any kind, efile manicuring of any style, or intricate nail art, do so only after some form of training that shows you the exact step-by-step, and safety precautions.
Any nail product or service that goes beyond a quick manicuring of the natural nails, should be used only after training.
Let’s recap the four safest nail products for DIY use again:
#1 Nail Lacquer
#2 Press-ons
#3 Nail Wraps
#4 Gel Polish Systems
A service that requires more time because of its intricacy and potential for harm because of misuse, is a pro service or product.
Remember, pro products contain ingredients that are stronger and require trained use for application and removal.
If you do not see pro-labeled products and services as the time and money investment that they are, and do not care to train in those products, please steer far away from them to avoid harm to yourself or others.
Professional grade nail gel formulas should be respected for trained use, and the professionals that work these nail systems should also be highly regarded for their expertise in applying these products meticulously and safely.
Applying nail enhancements of any kind is a skill, and an art in it of itself. And seriously… you won’t appreciate your nail tech’s skill… until you go out and try to do your own nails.
Again, I love nail DIYers. This is how I and many others got started in this industry.
Untrained DIY use is what really bothers and worries me because not having training is what gets DIYers in trouble, and I hope that after this video you can see the importance of training even as a DIYer, or to consider simpler and safer alternatives to doing your own nails.
If you would like to continue growing with me, a great place to start is that free masterclass I mentioned earlier or my free eBook Nail Gels 101. I’ll drop links to both resources down in the description box below along with any current or upcoming application courses.

Thank you for hanging out; drop your comments below, and share this post with a friend.
I’ll see you in the next one, and bye for now.

Content written by Paola Ponce.
Loved this blog? Then I think you’ll love learning more about my journey as a specialized gel nail solopreneur in the nail industry. Click here to get instant access to my free masterclass. These blogs are copyrighted material, and any use of this blog is not permitted without written concern first. Some of these blogs contain affiliate links that give us a small commission when qualifying purchases are made. Thank you for being so supportive, which helps us to continue creating valuable resources and content like this.


