
You’re seeing them all over Instagram, and it is trending even more than the seasonal tortoise nail design look… I know!! What is it… pop nails (AKA comic or cartoon nails).
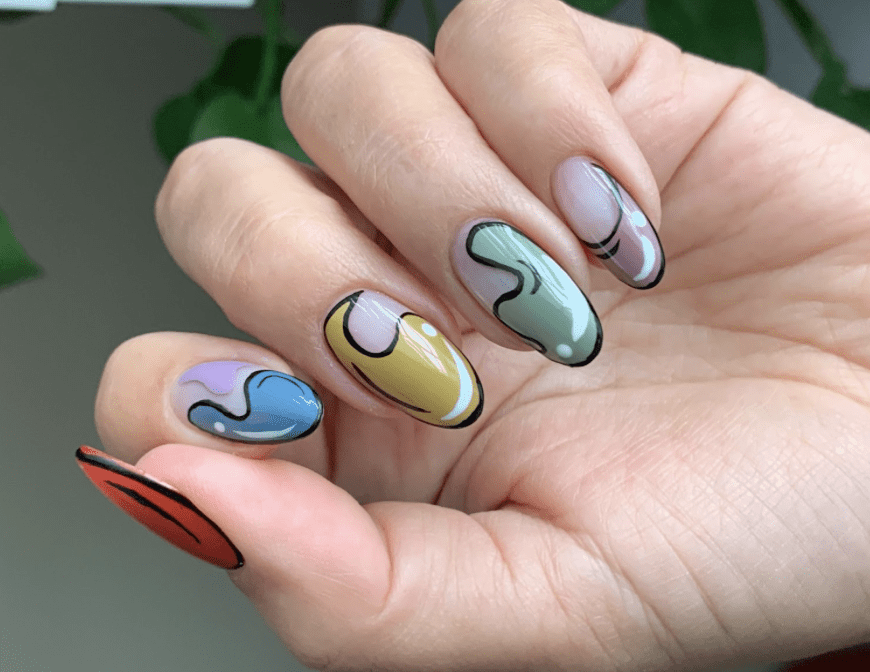
These nails are easy but super fun, and with just a few details, they give the impression of an animated look, to the tune of comic book-style nails!
And today, I’m sharing the how-to on cartoon nails using the newest Kokoist Japanese Gel Collection in this watch-and-learn post. All the products used today are from Kokoist, and if you want to shop, don’t forget to enter code PPN10 for a 10% discount on your purchase 🙂
Here’s the recipe for this look:
Materials:
- Five different bright colors, black and white.
- Long liner, thin liner, round liner brush.
- Top coat.
Step-by-step:
Start by doing the regular nail prepping and base gel application on all ten nails.
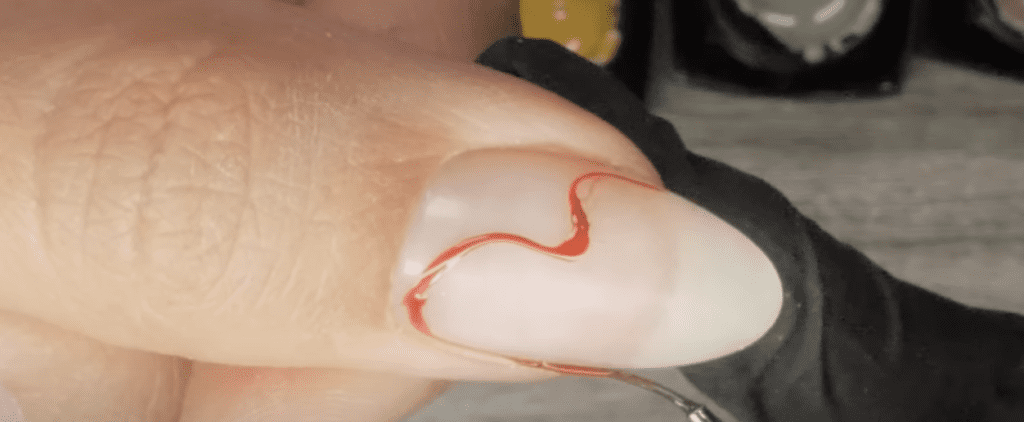
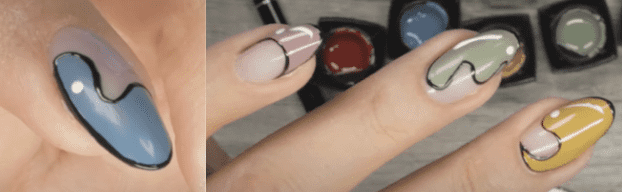
1. Grab the long liner brush and coat it with the first color you will use. I’ve seen this design on the internet, and it’s usually the entire nail covered with nail art. I will be doing a take on the modern french tip design by doing organic shapes on each fingernail.
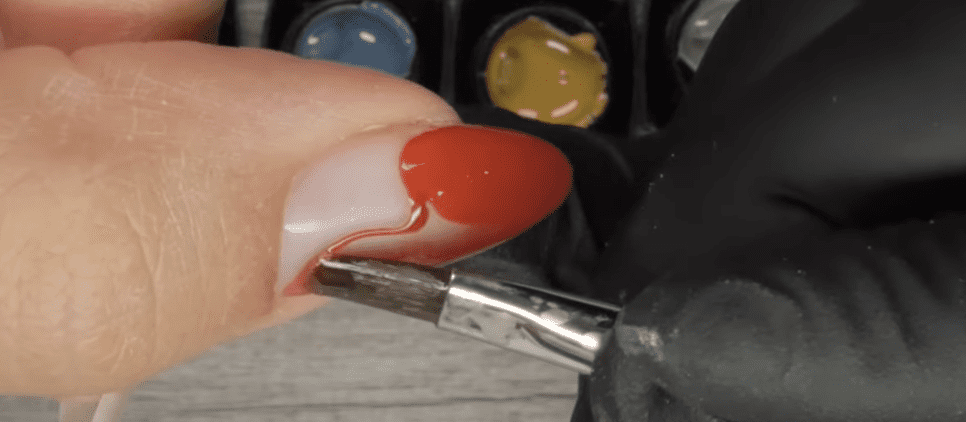
2. Once you paint the outline of the color area, use the round brush to fill it in and flash cure to start with the next nail. Do this with all ten fingers. Im using the colors from the Retro Groove collection by Kokoist, one color for each nail.
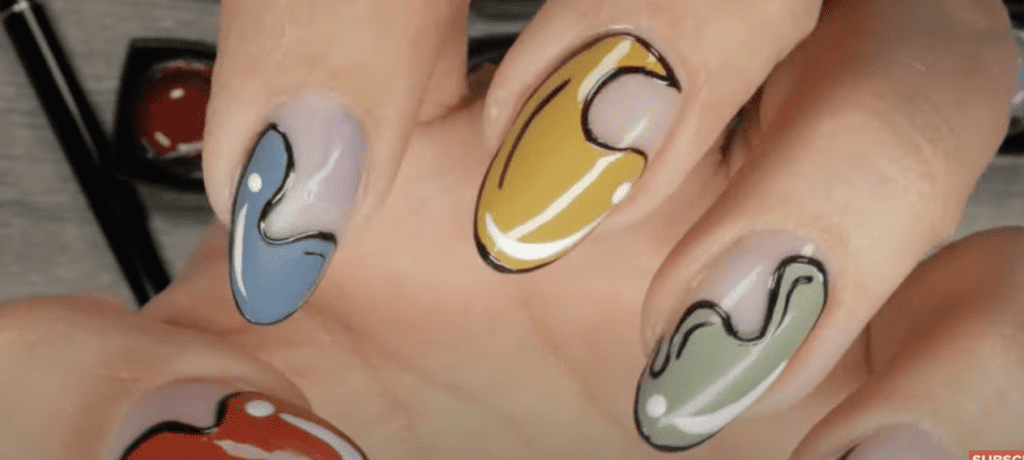
3. Now it’s time to paint the outline and light reflection details; these are the key element to make it pop art cartoon nails effect. I am using bluey white, a super crisp white, and the blackest black from Kokoist; seriously, it is the blackest black you’ll find. Also, I’m using the thin liner brush for the outlines.
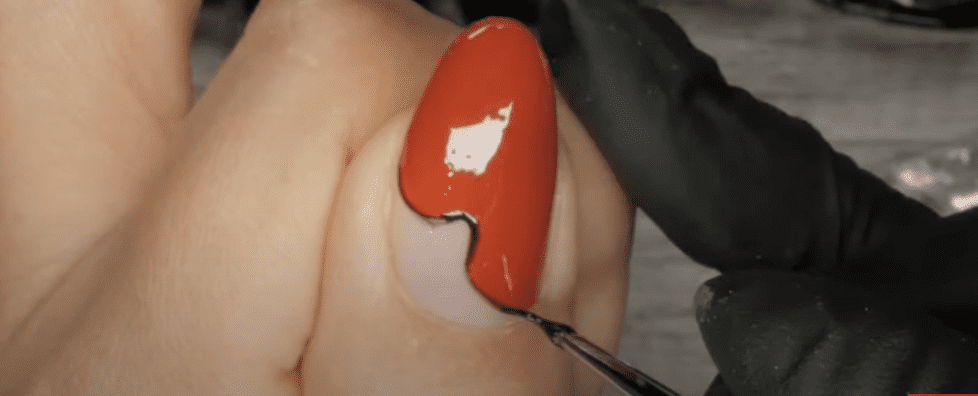
Start by lining the entire color area with black color like so. Repeat on all ten fingers and cure
4. Use a dotting tool to paint a dot of white gel inside the color area; this dot is the light reflection of the design. Coat the thin liner brush with white gel, and draw a line by the white dot.
5. Come back with the thin liner brush coated with black gel and draw another line, kind of opposite to the placement of the black line and take the hand for a full cure. Make sure to grab just enough white and black gel; if you grab too much, it may not cure properly, so just enough to paint the lines. Ta-dah! Cartoon effect! Easy right?
6. Reach for your favorite top coat. I am using my fave Ultra Glossy Non-Wipe top coat from Kokoist. Apply in all ten nails and cure for 60 seconds. The top coat smoothes everything out and makes it perfect, so don’t worry too much if it doesn’t look perfect after painting everything in.
Thank you for hanging out, and if you found this post valuable, would you do me a favor and share it so I may help more people. I’ll see you at the next one, bye for now!
____

Content written by Paola Ponce & Fabiola Saucedo
Loved this blog? Then I think you’ll love learning more about my journey as a specialized gel nail solopreneur in the nail industry. Click here to get instant access to my free masterclass. These blogs are copyrighted material and any use of this blog is not permitted without written concern first. Some of these blogs contain affiliate links that provide us with a small commission when qualifying purchases are made. Thank you for your support that helps us to continue creating valuable resources and content like this.


