
When it comes to creating Japanese Nail Art, believe it or not, mental roadblocks are hard to come by. This is because the products alone give you the feels and inspiration all on their own for you to create. Some of them, like the gel we’ll be using today, all ready come with nail art built-in.
Today, our key player will be one of Vetro’s Bella Nail’s latest releases. Now if you’re like, what’s Bella Nail, the Bella Nail Label is Vetro’s special effects collection.
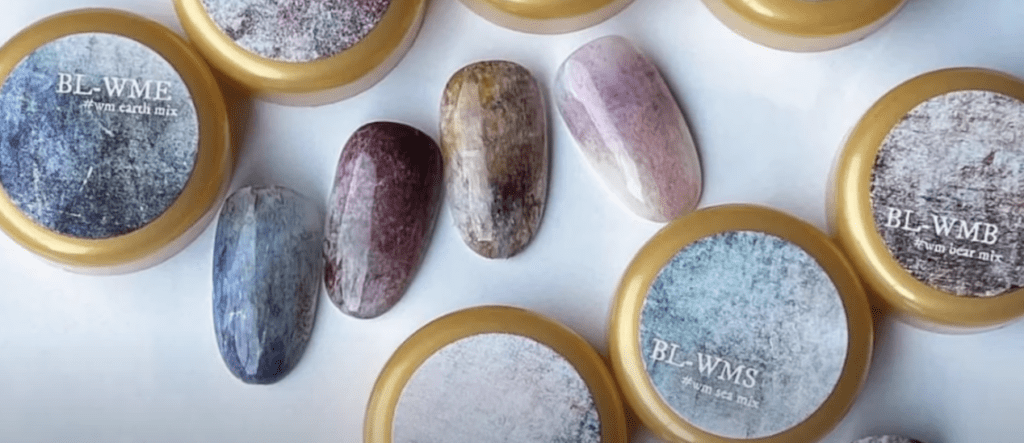
We’ll use the Art Clear Mohair Mix Gel Series from this label. This collection consists of 7 beautiful colors of mohair-inspired textiles. Yep, with this collection, we’re embracing the lint factor… the entire gel is essentially lint. And I’m telling you, once you see how I use them today, you’ll have your creative wheels going and understand how Japanese-inspired nail art is super easy.
I wanted chic & subtle, with a sweater weather vibe, and let me tell you what. We nailed it.
Here’s a fun fact about Japanese Gel, when you use it in a controlled manner, even after all of the layers you’ll see me use today, you’ll see that it hardly bulks up. It cures thin, yet it is super durable… but do remember nails… They are jewels, not tools.
Alright, I’ll be linking you to the places where you can buy today’s products in the description box below, and I’ll do my best to be as descriptive as possible in the video, but if I miss anything, please do ask in the comments section.
Here’s the recipe for this look…
These are all of the materials you will need:
- Art Clear Mohair Mix Gel Series
- Kokost Sand Beige Toffee E-172S
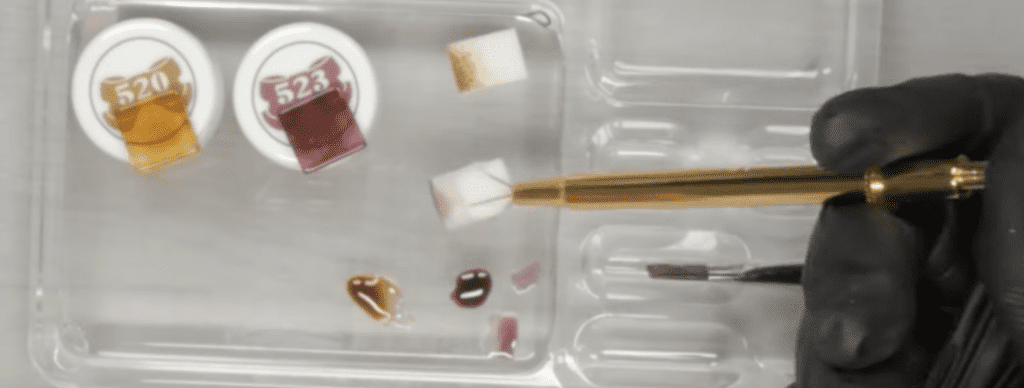
- Leafgel 520
- Leafgel523
- Vetro Clear Fuji Base Gel (Or Vetro Base bottled)
- Enne Nonwipe Top Vetro
- Sponges
- Daily Charme embellishments
If you want to try products from Kokoist and Zillabeau, remember to add code PPN10 at checkout for a 10% discount.
Step-by-step guide
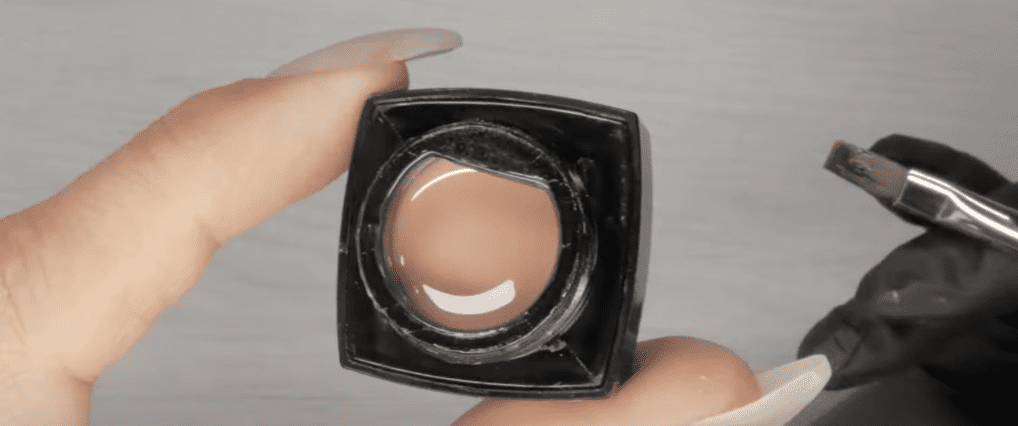
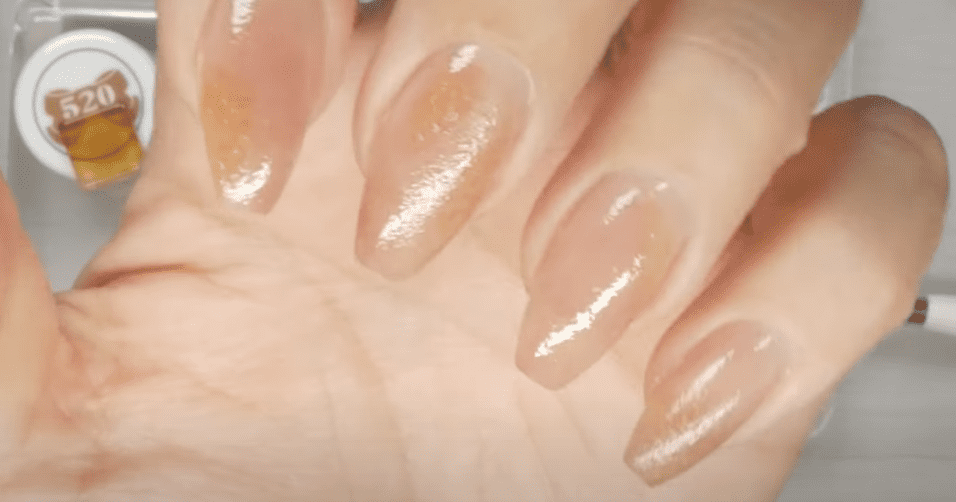
Step 1: Base color. After applying and curing your choice in base coat, layer two coats of Kokoist Sand Beige Toffy, curing between each application.
Step 2: Use a palette to pour/tap your colors on. Soak up some of the color on the sponge and then pat it onto the nail. Cure this quickly as it creates texture on the nail; only a flash cure is required. Continue to dab the sponged-on color where you want the opacity you like—flash cure for 2 to 5 seconds to keep the color still as you pat it on.
Step 3: Using another clean sponge with the second color, dab a little of the product where you like before giving it a full cure. Using two colors with the same tone but different color families helps create a dimensional look. (This depends on your product and whether you have the corresponding light unit.)
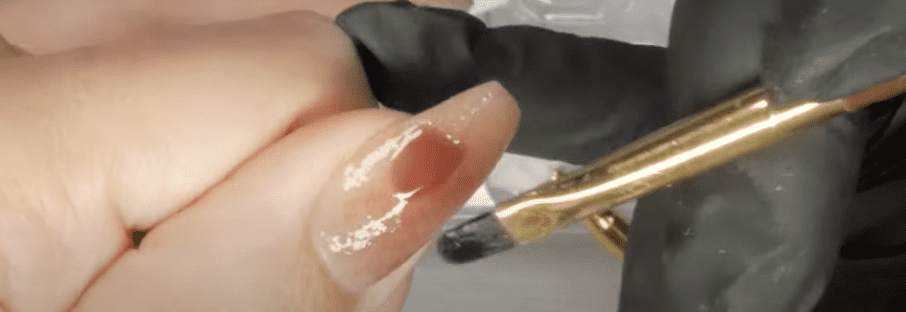
Step 4: Time for the fun stuff! These wool-patterned gels from Vetro will help achieve the look we aim for. I am using the BL-WMM WM Mellow Mix and BL-WMB MB Bear Mix colors. (Use a thin spatula or wooden stick to mix the gels before using since the fibers may have settled to the bottom of the pot.)
Apply a thin layer on every nail with the lighter color first before using a little of the second color on all nails. This adds a touch of dimension and texture. Give this a full cure.

Step 5: Remove the excess gel from your brush before darkening the areas you want with Leafgel 523 to add dynamic yet subtle flavor. Give that a full cure.
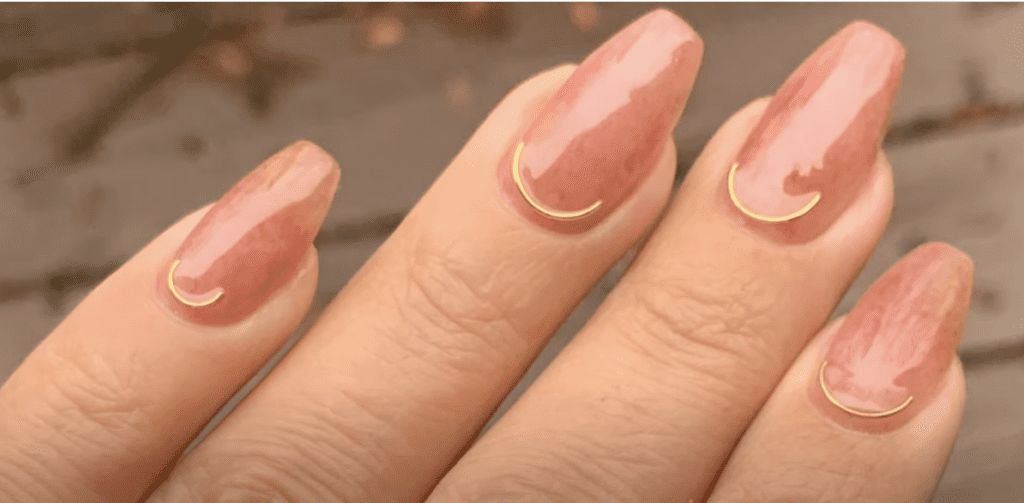
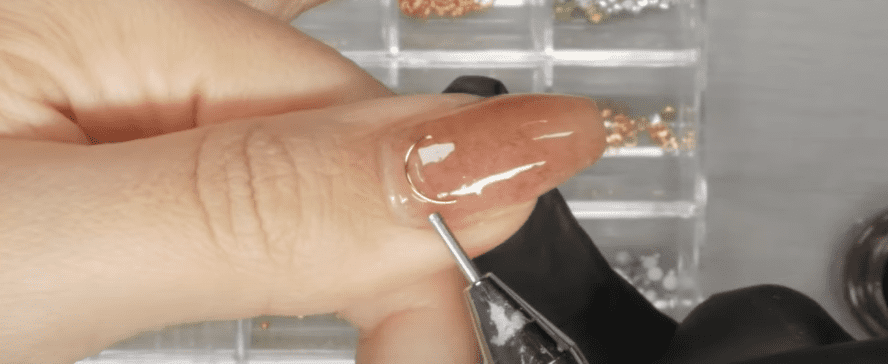
Step 6: Embellish! Use Vetro Fuji base to self-level the nails first and fully cure before using Vetro Extension Clear as your adhesion for embellishments. Draw a line with the extension clear around the cuticle area and apply the pieces you like before curing them into place. Depending on your speed, you can work two nails at a time or more.

Step 7: Encapsulations. Use a base of your choice to seal the pieces you’ve added into place. You can either coat the entire nail or just the jewelry; just be sure to saturate it so it can’t catch onto clothes and hair. I will be using Vetro’s extension clear.
Step 8: Seal the deal. Grab a crystal clear non-wipe topcoat. My choice is the Vetro Enne Top, and finalize your artwork so it glistens. Fully cure your nails and admire the tiny masterpieces you’ve created.
Final Thoughts and Recap:
So that’s one variation on sweater nail art you can practice to perfection. While this may seem intimidating at first, you will find it easier than you think, thanks to the freehand color placement and use of embellishments that can distract from any mishaps. Don’t be afraid to mix and match from the range available by Vetro Mohair Mix because there is no wrong way to create these with the help of this innovative art gel. What other ways can you think of to use Mohair Mix? Give it a go, and don’t forget to tag me in your cozy creations @paolaponcenails.
Thank you for joining me, and I’ll see you at the next one. Bye for now!

Content by Paola Ponce and Marta Kida Markowska
Loved this blog? Then I think you’ll love learning more about my journey as a specialized gel nail solopreneur in the nail industry. Click here to get instant access to my free masterclass. These blogs are copyrighted material, and any use of this blog is not permitted without written concern first. Some of these blogs contain affiliate links that give us a small commission when qualifying purchases are made. Thank you for being so supportive, which helps us to continue creating valuable resources and content like this.


