
How to size your press-ons?
So you have decided to give the press-ons gig a go, and right about now, you’ve hit the most significant hurdle yet. How do I know what sizes will my customer need? Once your customer becomes a regular, do you still need to size them and give her an extra amount of tips?
Aha!
Today’s topic will discuss 4 different ways to size your press-ons for retail.
You’re trying to figure out the most accessible, the quickest way to size your customer’s press-ons. Do you create 10, 12, 20, or 24? What the heck?
So here are the 4 options for sizing your client, and I’ll just tell you off the bat they are all a little bit of work. There is simply no way around not doing the work.
Option #1: Mail or have your client pick up a sizing kit from you.
You could charge her for this kit or bake it into your set’s prices. There is a lot of time and communication involved with this option.
This option was super popular when I was looking to start with press-ons about 2 years ago. But that was pre-2020. In those days of relative peace and normality, people would buy press-ons for special occasions or have something extravagant on their nails. Something they would not usually get on their regular salon visits. They needed them for their engagement shoot, wedding, or another super special event in their lives.
You and the customer had time to plan, so you could wait a bit for that back and forth communication.
Pros
The benefit of mailing a sizing kit can be two-fold. You get the most accurate sizing fit while focusing only on 10 nail tips. Your client can also practice gluing and applying at home.
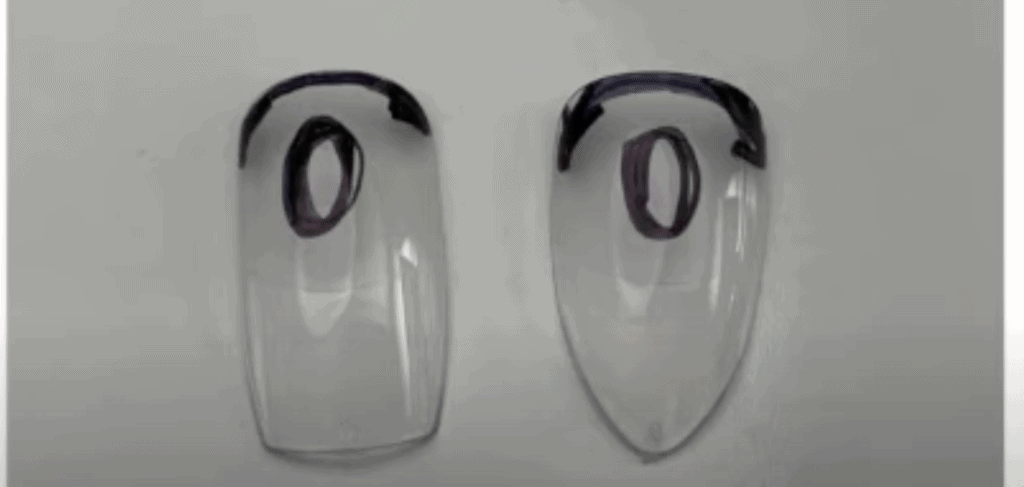
Ideally, you would send her all 10 tips of the desired length & shape she is interested in. Suppose she was interested in more than one style. In that case, you could send an extra 10 tips of a different shape & size, in which case you could and should charge extra for the additional sizing option. This is because your customer will not size the same, for example, in a short square vs. pointed stiletto tips, especially in different nail shapes and brand names. Unfortunately do vary slightly even when they’re from the same brand.
We’ll talk about one of my favorite nail tips brands towards the end.
An additional benefit to this method of sizing is that if the sizing is inaccurate, the blame, for the most part, is off of your hands because the client sized herself.
[P.S. My go-to for full coverage tips for press-ons and services is the Gelip brand from Kokoist. They are measured for you, pre-etched, and you can give them a higher apex by rolling them in between your fingers. Find them here. Save 10% and support my work using my affiliate code PPN10. This is just what I’m used to, but the Apres Brand is very popular, and press on artists seem very content with them.]
Cons
As I already mentioned, wait time. It will take at least 2 days for this sizing kit to get to your client. When your client decides to size herself and then get back to you on the sizing, it can quickly turn into a week’s wait time, at minimum. And what if your kit gets lost in the mail?? Yikes!
Another potential mishap of this sizing option is the potential for one nail to get damaged in transit or your customer to ruin it. In which case, she would not have a spare, and then you will be left to randomly mail in one nail… yes, just one. And not just stuck with sending it, but also re-designing that one tip.
Also, with this sizing option, you could have created her set 3 times over, given the time it takes to communicate back and forth.
Of course, your customer, if she lives locally, can pick this kit up, and that may speed things up a tad, but you’re still spending time communicating back and forth. So if time means money to you, mailing a kit as a sizing option may not be the best decision.
Option #2: Share a short clip with your customers on how to size their nail beds
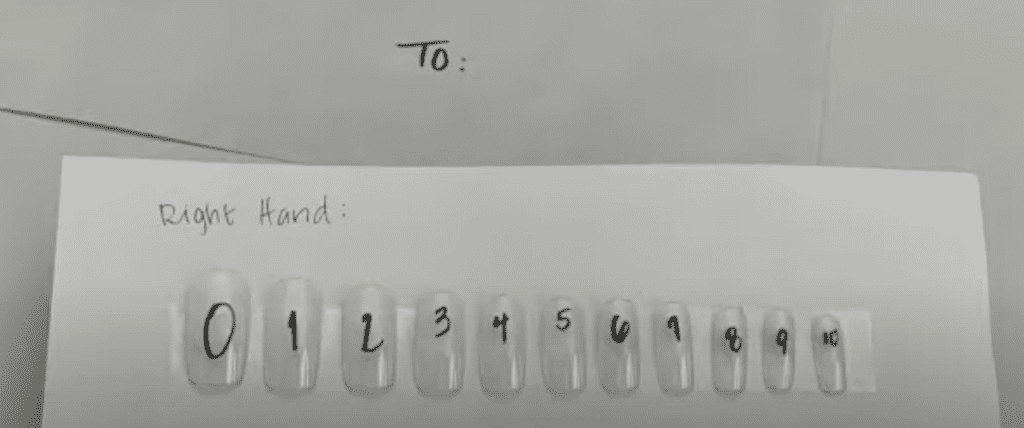
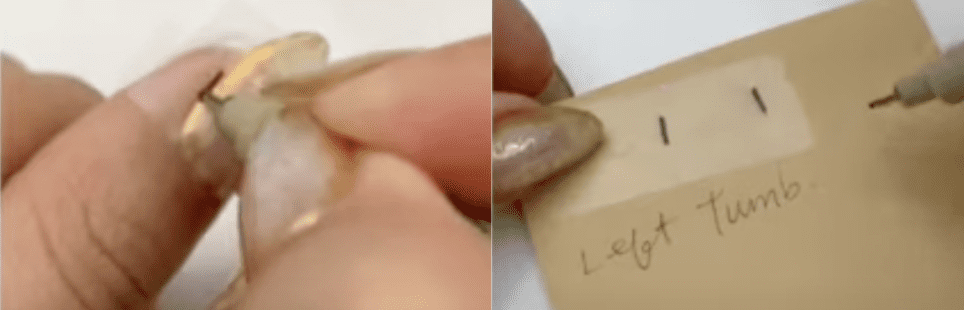
I saw this cool tip online where you take a piece of Scotch tape and make markings on it. You strip that piece of tape, place it on a flat surface, and measure it in millimeters (which you can do by taking the centimeter side of a ruler and multiplying the number by 10).
This option is way better than option #1, in my opinion. You don’t need to know your client’s sizes in different styles because you’re going off of the size of her natural nail bed, which does not change.
Because it is up to you to size her properly, you should send her an additional nail tip or 2 if you cannot choose between sizes.
Pros
It is probably the most accurate read for measuring, so you can customize a set as small as 10 nail tips (or 12 … if you’re nice). You also don’t have to wait for the mailing kit to arrive for your client and spend the extra money on the sizing kit and mailing it.
Cons
This option only saves you a tad bit of time. You are still waiting for your customer to sit down and do this measuring thing via your instructions…
Unless you have a deadline, homework is homework, and it probably won’t get done until you follow up. It’s simply how it goes. (Oh, and what if the client doesn’t have tape or a ruler?… Uhm, extra customer homework. This means she’ll take longer to submit or even get cold feet about this press-ons thing).
Hey! Before we continue… If you’re loving this information and would love even more direction in your press on nail business, the POP group is where it’s at! It is a membership site exclusively for current or aspiring press-on artists! It is peer-supported and led by one of the world’s most successful press-ons entrepreneur. Learn more about POP (Press On Portal) here.
Option #3: Offer different size sets. Like a small, medium, or large size.
Offer different size sets. Like a small, medium, or large size. This sizing option I really contemplated while thinking about press-ons 2 years ago. It is probably the most flexible for both you and your customer.

So in the small size press-on set, you’ll include thinner nails like size 2 and 5-9, 2.
In a medium-size set, you’ll offer 0-7, and in a large set, you can offer double zero through size 5, 2 of each for every size (small, medium, or large). This means you are creating between 14-18 tips total. Again super flexible, and the margin of error for sizing is still relatively low. Your client gets a few extra tips, which would prob. make her super happy.
Pros
The most significant benefit to this option is that you are excluding back and forth communication, which can just lead to a pause in production.
Cons
The cons to this option of sizing are relatively small. You do have to update your cart drop-down option to select SML and the shape of the tip attached to each size. Additionally, you are starting to invest more time by creating more tips, but I think you can pass it down in your cost.
I mentioned there is no easy way from the start of this post, but that doesn’t mean there isn’t a halfway point. I think option 3 is that halfway point.
Option #4: Go into full production mode and create ready-to-ship sets of only your most popular designs.
You’ll also not only be making each nail tip size but doubling up on some pairs. For example, middle sizes tend to be interesting because your client may size the same on ring and index or middle and ring. So rather than 2 number 4’s, you’ll need 4 #4’s.
I do believe size 4 to be the most universal; almost all of your clients will need a size 4 as that is the tip size I ran out of first when doing extensions in the salon.
Pros
With sizing option #4, there is zero communication between a client and yourself, and you are full-blown a production machine. Your client gets to just hop on and shop when you release. Katie (@nailthoiughts on IG) is finding significant success with this one. To be fair, Katie has considerable momentum on Instagram, so she can sell ice with her logo on a winter day, and she will probably sell out. But still, her strategy is super streamlined. 22 nail tips doubling up on her 2 most popular sizes, turn off her phone and paint paint paint until the release date. She has sold out every single time.
It seems like the Après Brand of full coverage tips is the most common used by press on artists as they are super quality, and many, including consumers have gotten to know and trust the brand.
Kokoist Japanese Gel Nail brand (you can use code PPN10, to save 10% off and let them know, we sent you) is a good alternative sourcing high-quality thin and flexible tips perfect for press-ons. They have a great variety of tips, very thin and flexible.
Regardless of what sizing method you opt for, please charge on the higher end. Press-Ons can take anywhere from 45 mins to 2hrs, and you definitely want to charge for your time. Let’s just say a minimum of $20 per hour if you’re counting the cost of materials, your labor, and the minimal cost of running this type of biz.
P.S. If you still need press-on product recommendations, here are a few of my faves.
Cons
Unto the big question of… What if my customer has already bought from me a couple of times and knows her size? I think this question bogs those who have gone with sizing option #4 of just going on full production mode. If that is your sizing method and you don’t want to adapt to individual customers, you can simply state that each set is sold as-is on your site.
If you want to be a bit more flexible and want to adjust to her sizing, still send her extras, and she can tell you what specific #’s she would like extras of. Then it is totally up to you if you want to create a discount code for her to use at checkout.
Personally, I would not go through the trouble and just state that my sets include X number of tips and are sold as-is. However, it is your business. The beauty of that is that if it does not inconvenience you, you can be creative with your exceptions.
Alright, I hope I was able to clarify this sizing issue and give you some options to decide which one fits your business the best. Let me know in the comments if you have tried any of these methods? Which one suits you the most? Thank you for joining me, and I’ll see you at the next one… bye for now.
Please note… These blogs are copyrighted material and any use of this blog is not permitted without written concern first. Some of these blogs contain affiliate links that provide us with a small commission when qualifying purchases are made. Thank you for your support that helps us to continue creating valuable resources and content like this.

Hello,
I have been following the Option 3 in your sizing for press on nails for my business, and so far it has been successful. However, I noticed you mentioned that 14-18 nails should be made, when according to the “small” option, you only make 12. Is this a typo? or Did I do something wrong?
Hi Tiffany! Either will work, more or less a guideline. How long has your biz been up?
This is a great blog post. I offer a mixture of all options…. I sell sizing kits with discount against their future set, I have detailed instructions on measuring with tape and writing them down, then I offer preset sizes xs/s/m/l,with option to order custom, if they know their sizes or full set if they want 2 of everything. Business is slow, but I’m in a country where press ons hasn’t taken off yet, so it’s getting there….
I was just wondering though about the full set option for a patterned design… i like the idea of extra size 4’s but do you have any tips on how to plan a design?
I want to know the how can we make pressons without reference like the common size
How would you go about determining what sizes to include in each size group? In regards to option 3.
Hi Laura!
My name is Fabiola, and I am on the PPN support team. The sizes you would include in each group are pretty standard; these are the sizes that people usually fit if they have a large to extra small hand size. Most press-on artists use
L= 0, 4, 3, 5, 7. M= 1, 5, 4, 6, 8. S= 2, 5, 4, 6, 9. and XS= 3, 6, 5, 7, 9. I hope this helps!