
You’ve just had a beautiful gel service done or have given yourself one when pain radiates from your nails.
Beauty is pain, right? Wrong!
Even if it’s happened countless times before, with the right information, we can prevent it from happening again.
A nail service should be relatively painless, both during and afterward.
Pain during a service can simply be because of the technician being a little too aggressive. However, this can be addressed while we are experiencing pain.
But what if you had a relatively painless service, and then you or your client go home, and within a few hours or the next day, discomfort or pain begins?
Today, we will address five potential culprits and what you can do to avoid pain after a nail service.
Pain Culprit #1: Aggressive and careless technique
The first culprit that may be at play is the overeager nail stylist’s aggressive technique.
I know, this may not be the first answer you reach when investigating the cause of your pain.
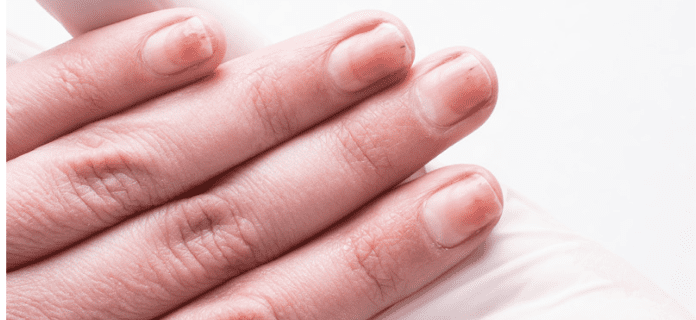
Sometimes, the aggressive (and maybe also) careless technique directly results from technicians who work in an environment that values time over quality. This can lead to incorrect techniques, such as over-filing the natural nail plate or using a file that has too coarse of a grit. You may not even be able to feel it right away, but if there are red patches on your nail plate beneath the gel, this is a sure sign of the nail plate having been filed too thin.
Another way to be overly aggressive when manicuring the nails is by using a cuticle pusher roughly. Pushing on the nail plate or the surrounding skin with too much pressure may result in inflammation and damage to the nail matrix, where your nail grows.
How to resolve culprit #1: Speak up
In the context of another person working on your nails, if the pain is felt during service, take the opportunity to say so. Don’t worry about offending anyone; your comfort should be part of your overall nail experience. However, this should be a rare occurrence, if at all. Sometimes, nail techs have no clue they are using too much pressure, believe it or not. Imagine yourself in the same position and how awful you would feel if you hurt someone without realizing it; you would want your client to speak up and let you know.
Now, if you DIY your nails, pay close attention to any uncomfortable sensations during and after your manicures. This can mostly be delegated with the correct information and training, such as specialized courses available in person and online. If you are serious about this hobby, consider investing in yourself and watch how it elevates your nail game. This will also allow you to learn from a master in their craft, getting the guidance and support you can’t find in free resources.
If you’re considering improving your skills, my free masterclass is a good place to start. Check it out here.
Pain Culprit #2: Naturally thin & weak nails
No matter how healthy we are, most of us aren’t all blessed with strong nails. That’s why we get “strong nail enhancements done,” like gel polish, dip powder, acrylic, you name it. Those with beautifully strong nails will put on a coat of nail lacquer and be done.
While we may do several healthy nail rituals to fortify our own natural nails, strong nails come down to genetics, and if you’ve always struggled to grow your nails past the tip of your finger, you may have naturally thin nails. Thin nails easily tear and bend at the slightest knock, so it only makes sense that these require an adjustment in treatment. Less keratin protects the nail bed when the nail plate is thin, so heat spikes felt during the curing process will be expected. These types of nails usually flex a lot, and you (or the nail tech) may be tempted to etch the nail plate with a coarse grit to keep the product staying on, but it would only thin the nail out further, creating a cycle of pain and lifting nail enhancements.
How to resolve culprit #2: Gently does it
Once you have established that you have this kind of natural nail, you must be vigilant in gentle prep and application. You don’t want to thin the nail further, and avoiding heat spikes will be a priority, especially since they can damage the tissue beneath. If receiving a manicure, simply let your manicurist know you have thin nails, and they should follow appropriate care. If you are doing your own nails, be sure to apply the gel in thinner coats and never etch the nail plate, you need only remove the shine gently with a 180-grit buffer. Avoid gel, acrygel, or other enhancement systems that require you to roughen the nail surface. Japanese and Korean gel products usually have built-in primers within their gel base; this helps eliminate the need for these more abrasive methods, perfect for thin and weak nails. My favorite DIY base is Nail Thoughts By Kokoist Clear Builder Base ( It’s a 2-in-1 base and builder; just apply generously… not super thin, not super thick. No bonder or primer is needed with this, and just a gentle buff to remove shine does it as prep. It soaks off with acetone).

Pain Culprit #3: Health issues affecting the nail
All nail services should only be done so on a healthy natural nail. If we were to work on a compromised nail, we could risk making it worse, which is the last thing we want to happen. Many medical conditions can make the nail more sensitive, dry, peeling, etc., and it’s essential that we are aware of these since they not only hinder the performance of enhancements and gel polish but could create pain during and after the service.
How to resolve culprit #3: Pre-examine and refuse if necessary
Of course, some nail disorders are not as visible as others. Still, if after a thorough first consultation or checking the condition of the nail during a subsequent appointment, the healthy state of the nail appears to change or is not “normal,” then we should refuse service. Now, if this is a returning clientele, you may want to analyze if this is due to anything you did wrong in your application.
But what if we are working on ourselves and we notice a problem? The same advice applies to doing our own manicures. If you know you have a condition that affects your nails, stop servicing your nails and have the issue cleared by a trained health practitioner before continuing.
I created this video with 5 of the biggest safety tips you can take for a safe DIY gel manicure, or if you want to test how well your nail tech adheres to safety tips.
If you are working on the public (or even with friends and family), it is very important to examine the hands and nails before service and ask the client if they have any medical conditions that could be affecting their nails. It may feel intrusive, so it is best for them to fill out a form rather than ask out loud or in a public salon place.
Pain Culprit #4: Overcured gel – Heatspikes
This culprit sneaks up on you, and the burn is real! Have you ever applied gel onto your nails and put them in to cure, only to have a searing pain shoot from your nail bed? This is a heat spike, also known as over-cured gel or gel that cured too quickly. When the gel product is exposed to UV light from your nail lamp unit, the chemical reaction from that liquid to the solid state (because of the friction in molecules coming together) creates an exothermic reaction, which releases heat. Even if you have had a sharp heat spike happen many times before, these should be minimized.
Do not ignore high heat spikes, as this pain can burn your nail bed and cause a whole host of problems, including onycholysis, a condition where the nail plate lifts from the nail plate.
How to resolve culprit #4: Switch your curing process.
Thankfully one new feature to so many curing units, including the Kokoist Le Blanc Curing Unit and the Leafgel one, is the ability to cure at a low-heat mode.
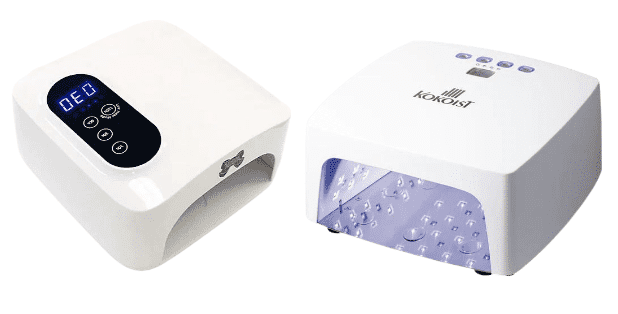
With the Le Blanc by Kokoist a 90-sec timer has been developed for the nail lamp. This setting allows the light to pulse so that the heat never spikes too fast. In the Leafgel curing unit, the light will cure at a lower intensity for the first few seconds (I believe the first 15 secs) and then go to full intensity. Anyone experiencing curing heat sensitivities should use these settings, especially when natural nails are thickly overlaid, like structured gel manicures.
Though we love our partners over at Leafgel and Kokoist, the best curing unit to buy is the one that the manufacturer of the gel uses sells, as they would have calibrated the system to cure properly.
The next step is to use thinner coats of product, especially builder gels, which are usually rolled onto the nail plate in a large bead, for structured overlays and extensions. It is simple, use less gel, and less heat will be released when curing.
If your lamp does not have a low-heat setting. One last tip would be to have the hand lay just outside of the nail lamp when curing and slowly inch inside, decreasing the intensity of the wavelengths since you are further away from the light source. Just be sure to double-cure the gel after this method since less intensity will require a longer time to reach this optimum completeness of cure.
Pain Culprit #5: Irritation/Allergy
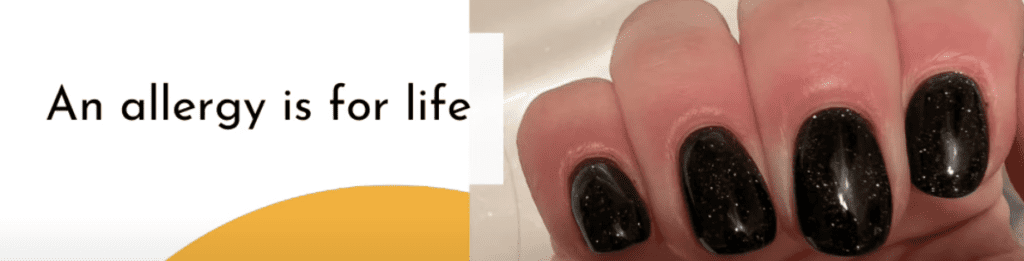
This is the most important culprit since an allergy to gel products can kill a nail technician’s career and have a concurring consequence on future dental and other medical work. An allergy is for life, and once you have it, you must tell your doctors, dentists, and surgeons if you are going to have anything done that involves acrylates. Usually, an allergy starts with an irritation like itching or stinging, and you can think of this as the body’s warning system. Unfortunately, there have been instances where an allergy begins almost immediately, which means having to check the ingredients of every gel product you use to avoid the particular one you are sensitive to.
How to resolve culprit #5: Prevent it
Before resolving anything, we would want to avoid it first. To avoid developing an allergy to gel products, it’s vital to follow manufacturers’ instructions, such as not letting the product touch skin and using the brand-recommended and tested curing unit.
Let’s not forget the dust that lands on our hands and arms or that is breathed into our lungs. If this dust is not fully cured, it still has unreacted monomers. Unreacted monomers are the real culprit in gel nail allergies. A monomer is an ingredient that thins the gel down and gives it its adhesion properties.
Remember, a gel can look and feel cured at only 50% cured, but for a proper cure, it actually needs to reach close to 90%. The only way we can feel confident about this is to use a matched system from a high-quality brand and the lamps they have tested themselves; otherwise, it is like gambling with our health. And remember, 99.9% of the time, it will not go away once you have an allergy.
Once you have an allergy, it is best to get the correct testing from a dermatologist who can pinpoint the exact ingredient/s that you should avoid in gel nail products. In the meantime, remove all nail coatings and avoid all nail services to let your hands heal with plenty of nourishing, high-quality cuticle oils.
Let’s recap the five potential culprits related to pain after getting your nails done.
- Aggressive and careless technique
- Naturally thin/weak nails
- Health issues affecting the nail
- The over-cured gel in the form of heat spikes
- Irritation or allergy
Thank you for watching, and I’ll see you next week. Bye for now!
____

Content by Paola Ponce and Marta Kida Markowska
Loved this blog? Then I think you’ll love learning more about my journey as a specialized gel nail solopreneur in the nail industry. Click here to get instant access to my free training. These blogs are copyrighted material, and any use of this blog is not permitted without written concern first. Some of these blogs contain affiliate links that give us a small commission when qualifying purchases are made. Thank you for being so supportive; that helps us to continue creating valuable resources and content like this.

![[[ Nail Thoughts X Kokoist ]] Bottled Gel Launch | All COLORS SWATCHED](https://paolaponcenails.com/wp-content/uploads/2020/11/ntswatchesnewthumb-1024x575.jpg)
