
“Easy On Me” Nail Tutorial: Sculpted Gel Extensions
Well hey there! Adele dropped a new single last night, the first song in 6 years! Maybe we should celebrate this, right? How about new-single themed nails. The new song “Go Easy on Me” dropped today and I don’t know about you, but who else was checking out the nails? Me!
Tonight we are going to be doing a set just like that or very similar… just you know:(Sings) ”Go easy on me”.

Step one: Clean & Prep
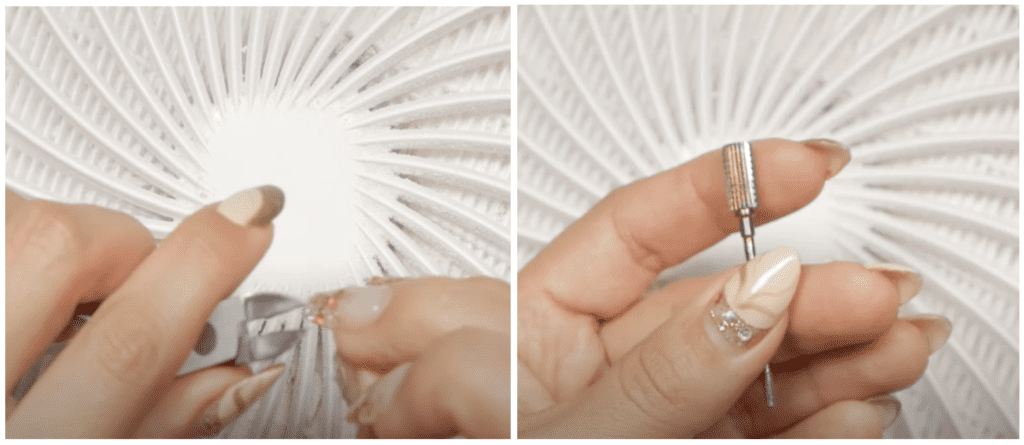
Let’s get started. I’ll begin by removing these studs, charms, and crystals (I like to use my Staleks Nail Nippers for this step, do NOT use your cuticle nippers!) I’m doing that first so I don’t mess up my e-file bit and after that, I will e-file this smooth (any medium to coarse grit carbide will do).
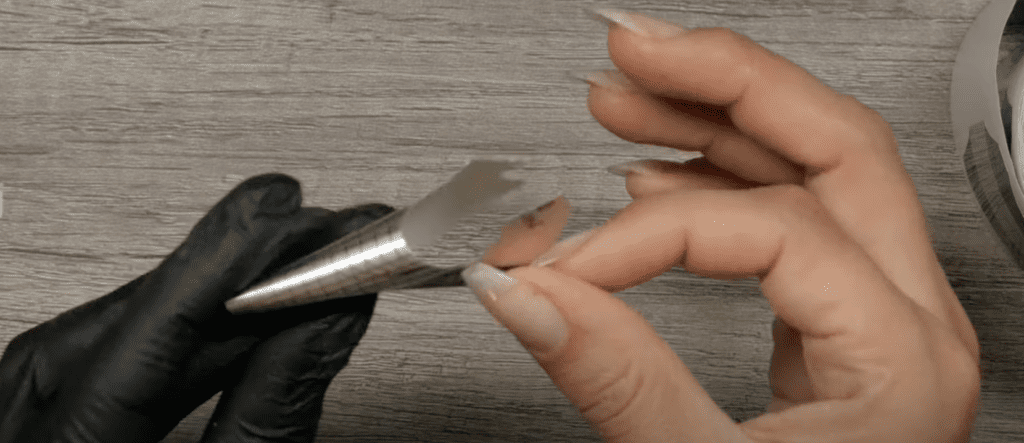
I will be extending these nails with Kokoist paper forms. Typically you want to cut your nails off when you’re doing this, BUT I can’t get myself to cut my nails right now. Also, I do have a break here that I will patch up before extending them.
Ok, people usually apply base gel and then forms or sometimes forms and then base gel; it’s up to you what you want to go with first. I’m going to apply base gel and also, fix this tear here. I don’t know if you can see it, there’s a little line there and perforation that turned into a tear.
Step two: Repairs

I’m just going to do an old-school silk wrap repair. It is very important for you to take care of your repairs before doing anything else; whether you were just going to overlay these or extend them like I am, it’s just going to reinforce them and the last thing you want is a nasty little break right?
This gel is wet and I’m just going to stick the silk wrap onto the wet gel, trim it right at the end. I don’t want to leave any excess. I find that usually, that’s not the best way to hug the tear, so that’s why you want to get the cut all the way close to the nail.
After you have cured, you do want to overlay this one more time with whatever service you are continuing. I’m continuing with extensions, and for that reason, I’m just going to take a little bit of Kokoist Mega Stick Base here and just overlay it, like so, because I’m going to come and build on it.
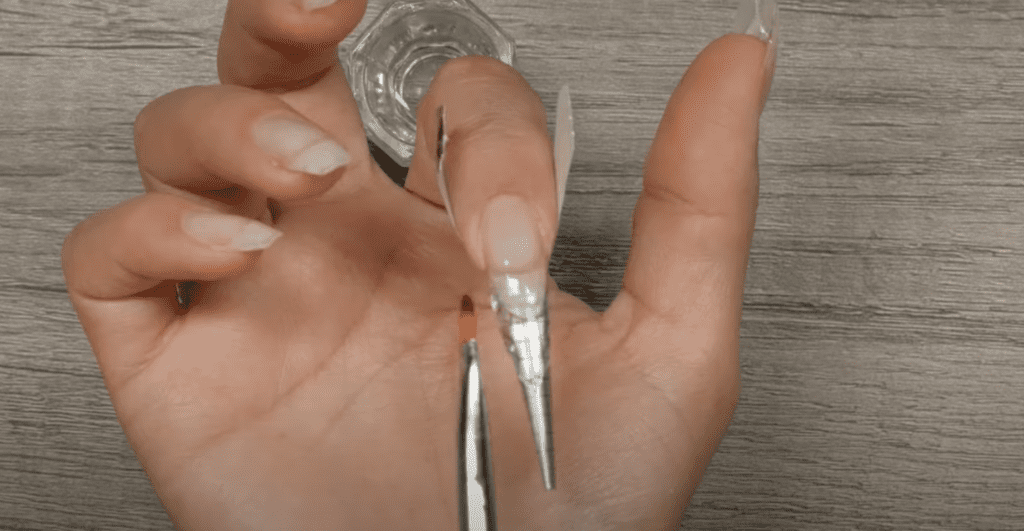
Okay, base cured. Now it’s time to move on to our paper forms, because I did not cut these, I’m not also going to cut the forms. Many people cut the forms and I think that’s necessary when you go super, super short on the nails; which is recommended.

Step three: Nail Forms and Extensions
Moving on to forms. Did you know that keratin is the strongest enhancement for long nails? This keratin will help the nail stay strong because… I don’t want to cut my nails.
As much as I’d love to just do the Japanese show, I don’t want the enhancement to be bendy or vulnerable to breakage with this extreme length. With our Japanese gel, remember: You only do up to double the amount that’s attached to your nail plate, obviously right now we are going “Adele’s size”, which means we need a little bit more reinforcement.
To do so, I’m doing my little poly gel hack. I’m taking a little bit of poly gel (which I’m not very experienced with) and, I’m not even going to use it on my natural, I’m just going to use it to create essentially a plastic tip. Remember: Any enhancements, in essence, are a form of plastic, so I’m using just clear poly gel here to attach a long free edge to this so that it’s nice and sturdy.
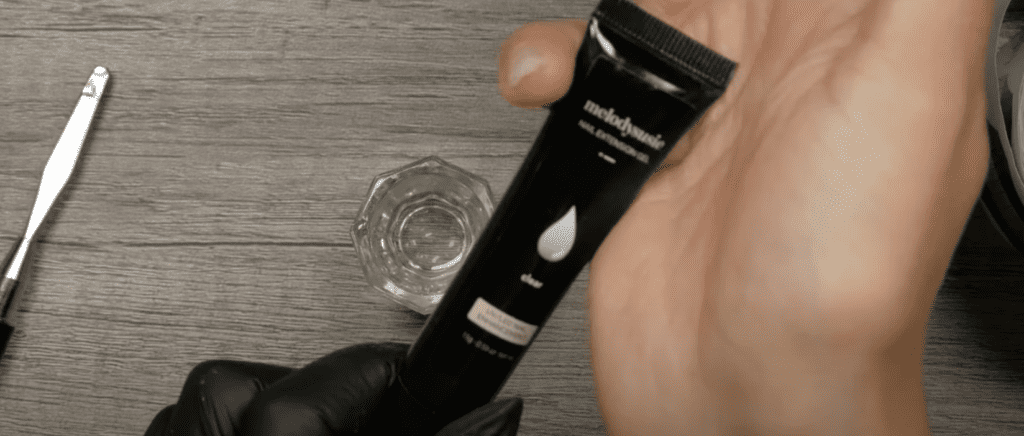
I often get asked what poly gel I recommend, and I do not have a preference. I’m just using this MelodySusie poly gel kit at the moment.
Extending the free edge with poly gel it’s almost the equivalent of attaching or gluing on a fake tip because that’s all I’m going to be using to create the free edge. Now, you may be saying: “Okay, well, why not create the entire nail with poly gel? It’s going to be much stronger”
Two things: I don’t own a whole bunch of poly gel, this is the only clear tube I use. Second, I only use it for hacks, anytime I want to create something with volume. Also… I just don’t use poly gel much at all. As you know, I am through and through with Japanese gel and that’s just what I want to use.

Remember, Japanese gel keeps your natural nails kind of narrow even when you go to extreme lengths like this, so I want to keep that property of the gel to my nails. I want the nails to stay long, thin, and kind of natural-looking. Obviously, this is not a natural shape so I’m going to do this, one by one. Since I’m doing it on myself, I just don’t want to be messing around with the forms.
In the salon, I did all ten fingers with forms, and sometimes I wonder if it would have been better, just for stability, that all my forms went on one at a time. Yes, it would take a little bit of time; however, I feel like once you get the form part down you’re home free.
If I could have just spent a little bit of time just doing one by one, then just quickly file them into shape and overlay them, then maybe I would have been happier with my results (not that I was super unhappy). I think it would just it would have been a little bit more detailed.
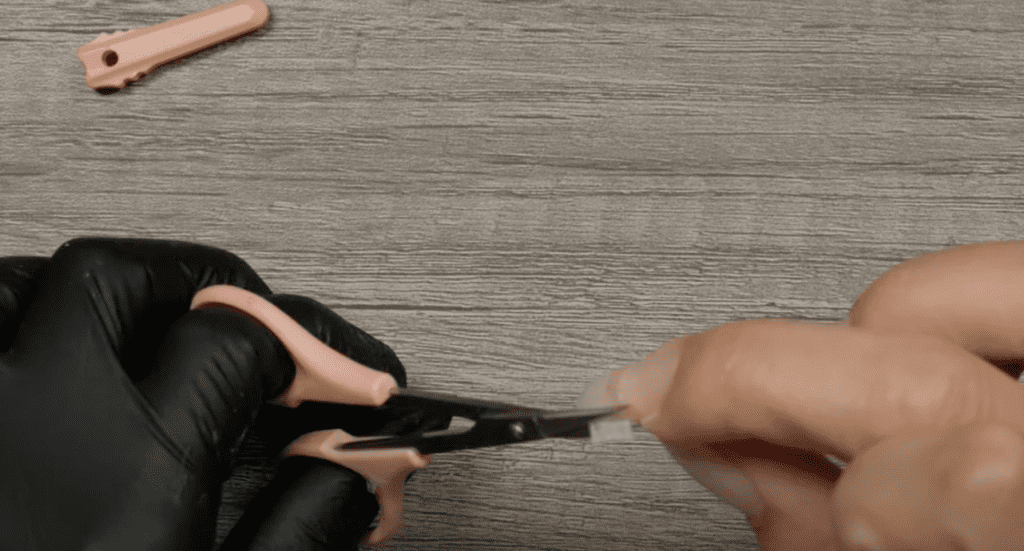
Now I’m going to remove this tacky gel surface so that I can go ahead and finish filing these, well actually we’re not finished filing yet.

I like to file here because Japanese soft gel is very runny and it’s going to go run to every nook and cranny if I don’t file these smooth to a nice shape. Right now, I just want the nail surface to be smooth so there are no grooves or dips, and the gel just seeps into it, otherwise, you are going to have a very hard time self-leveling.
Step four: Filing and Shaping
Next, I am using my e file since this is the harder product to fall on. I’m using a coarse carbide bit (remember any medium to coarse grit carbide will do), followed by a coarse grid board file. I want them to be smooth and shaped to what they’re supposed to look like. I’m not going to fixate on making them perfectly shaped quite yet, this is still a guideline and outline for my gel overlay.
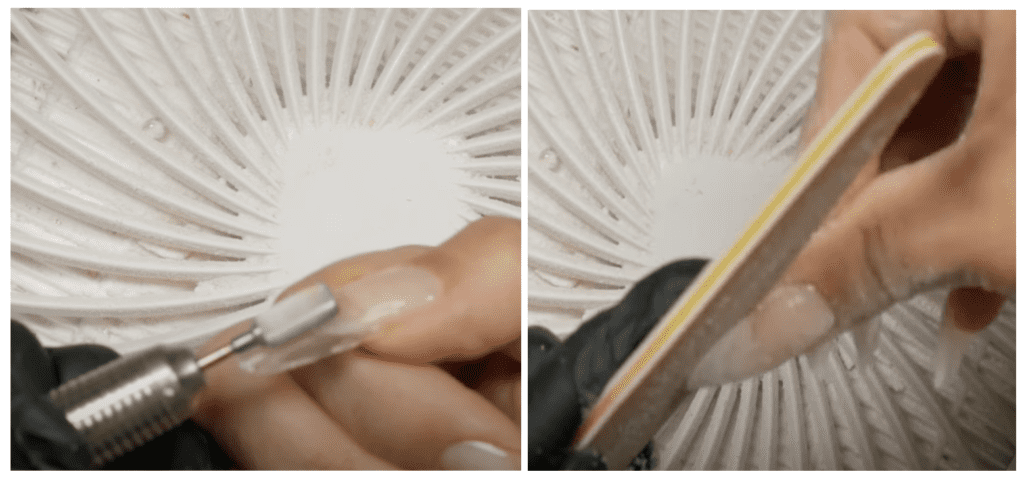
I know, that was a little intense but, super necessary for this type of gel; it just flows a little more than normal and perhaps you’re like: “Well why not just get like a thick sculpting gel?”
In the Japanese gel nail system that kind of doesn’t happen or it has not happened quite yet. This just allows the nails to cure thinly and naturally without bulk. If you want extreme nail length like we’re doing tonight then you have to go through these extra steps. It is a few processes but I think it looks marvelous! I think it’s worth it (winky face emoji) but, hey! Totally up to you. I’m going to clean and buff these so the product that’s coming on them adheres.
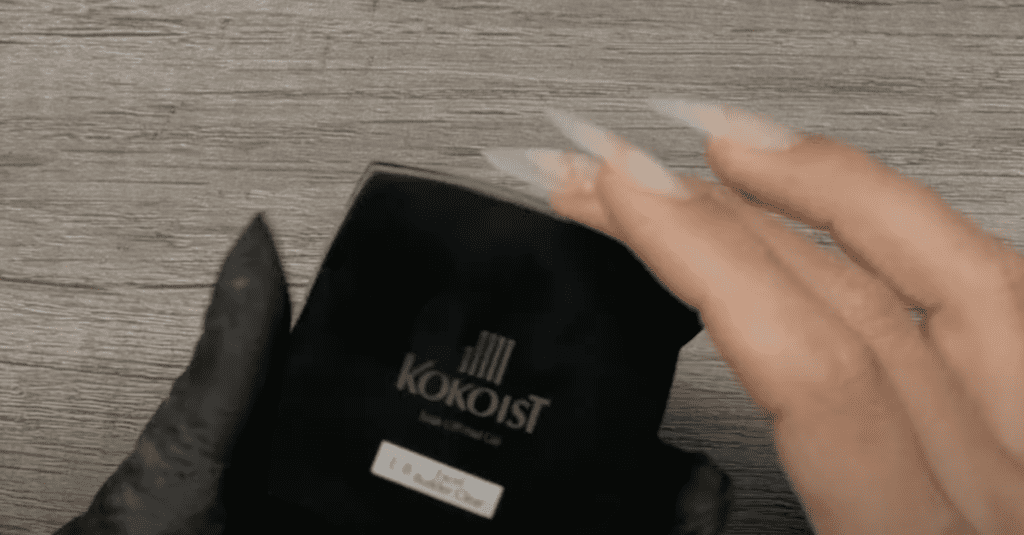
Step five: Overlaying
To overlay these extensions, I’ll be using Kokoist’s Soft Builder Gel, Excel Builder.
These aren’t filed to perfection yet, but this is after our builder. Looking fabulous! I haven’t had nails like this, like never, so this is a first-time event for me. Now I am filing these into the perfect shape before color.
Step six: Color and Top coat
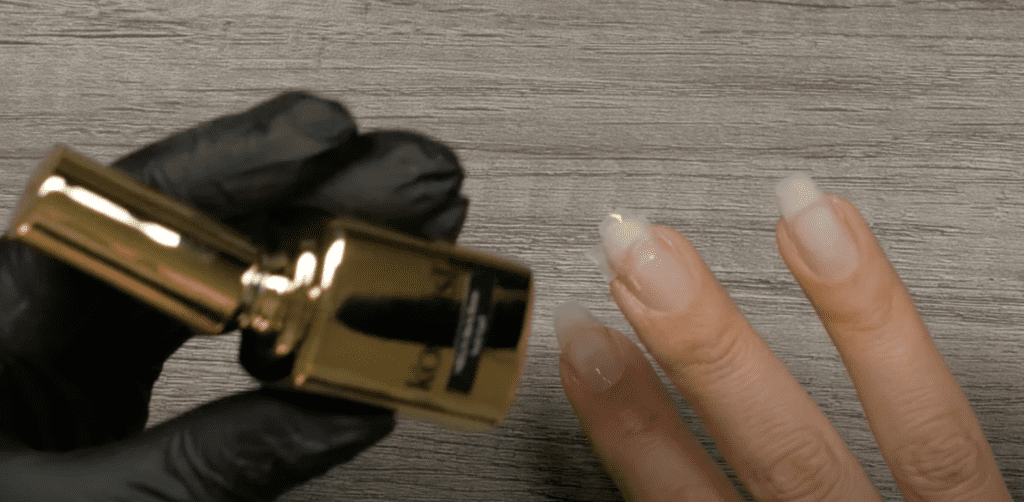
You know what? I actually don’t have the exact or near-exact color as Miss Adele has in her video, so I will have to custom make it. Do not fear! This should not be painful. I’m going to grab these two Kokoist colors: E-247 Goji Berry Bread Pudding, E-241 Viola Purple Glass, and a lot of black (E-2 Maxi Black).
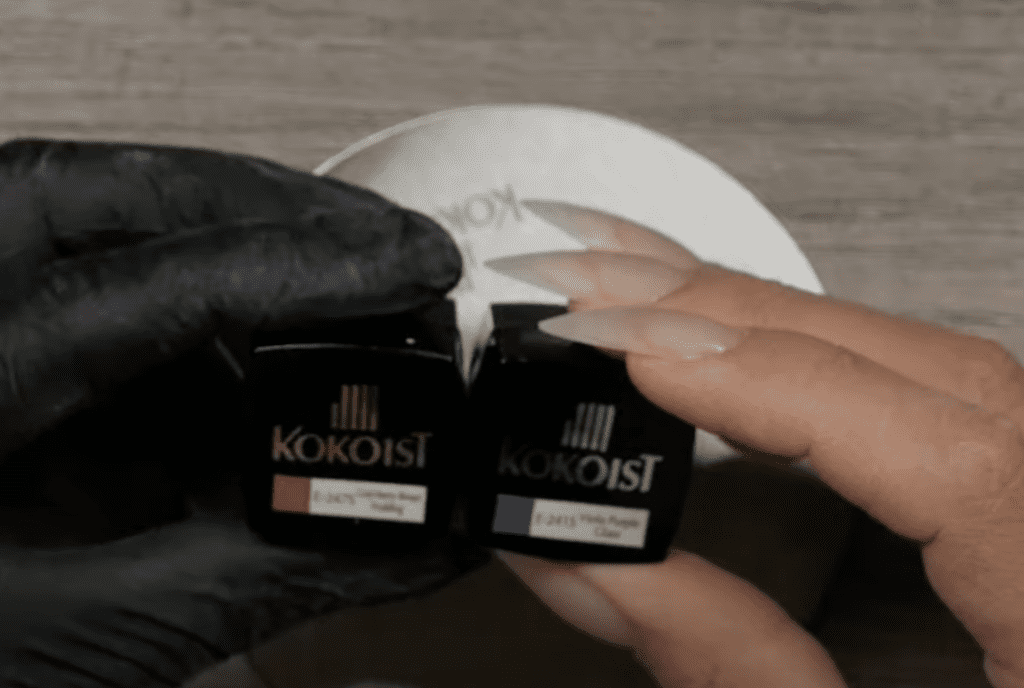
Gogi Berry Bread Pudding is like a little burgundy red and Viola Purple Glass is a translucent purple. The color she is wearing needs a little bit of purple and most importantly black. I’m going to mix this and then apply.
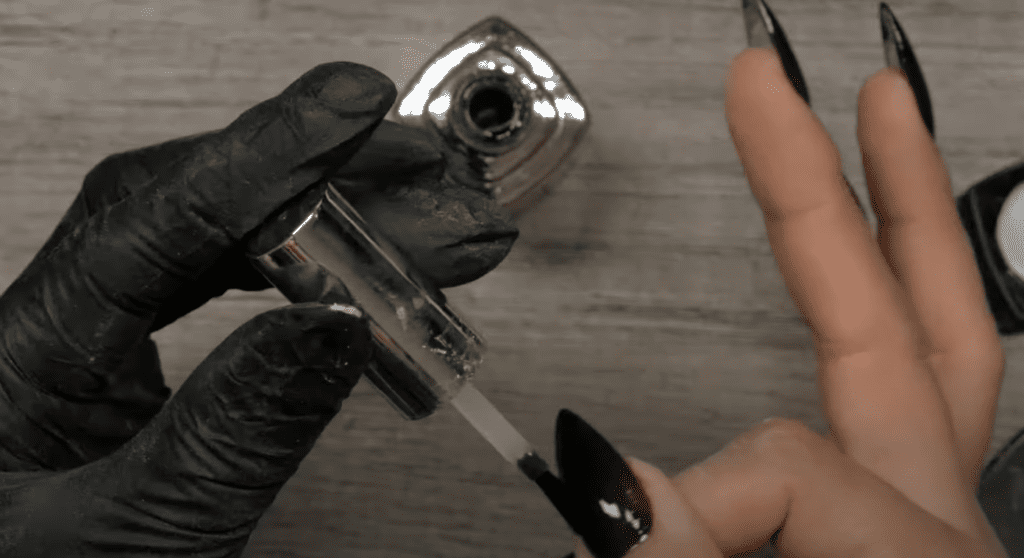
The color was coming out a little too red so what I did was add more black to the mixture and this is what I have. I really, really like this color. Remember: A little red, a little purple, and a lot of black, mix and then apply it. It’s okay if you don’t get it in the first coat, you can definitely go back and apply it to your second coat. I’m just going to topcoat these babies (I am using Kokoist Ultra Glossy Top Gel top coat) and we are done.
I think we did fantastically. Let me know what you thought and if you enjoyed this tutorial and I’ll see you next week! Take it easy on me now.
These blogs are copyrighted material and any use of this blog is not permitted without written concern first. Some of these blogs contain affiliate links that provide us with a small commission when qualifying purchases are made. Thank you for your support that helps us to continue creating valuable resources and content like this.


Beautiful form and color is just perfect for fall. Love it!
Thanks Fabi!